21 Haircuts for Women Over 60 With Naturally Wavy Hair
Let your hair dry before choosing a reference photo. You’re looking for the first bend beside the face and the spot where the back starts to wave.
A haircut for naturally wavy hair works best with the bends you actually have. A cut you can wear on an ordinary morning starts with that dry shape.
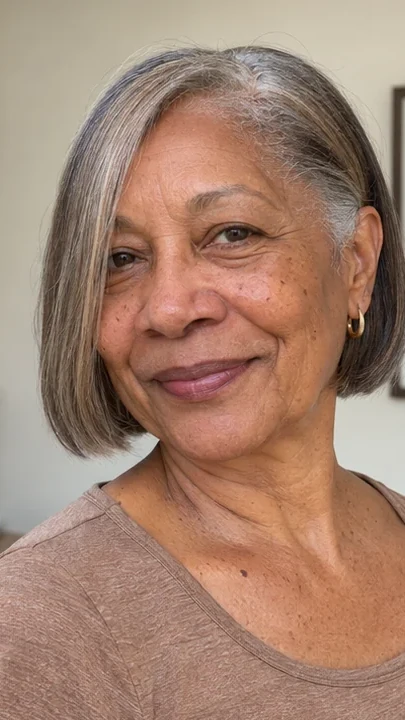
1. Jaw-length wavy bob

Leave enough length for one full bend to form beside the cheek. If your hair starts to wave halfway down, a jaw-length edge might sit straighter than the photo. Take a picture of where that first curve starts before deciding how short to go.
A smooth edge beneath that bend will show clearly from the side. If your face-framing strands are straighter than the back, keep those pieces a little longer so you can tuck them without losing the shape.
2. Collarbone wavy lob
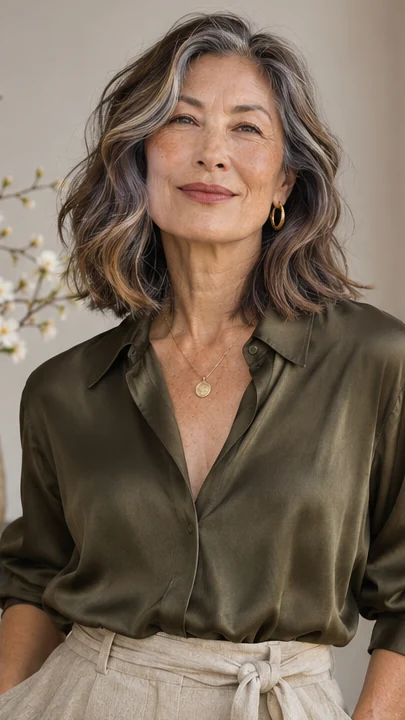
Brush the hair back behind one shoulder while it’s wet and let the other side hang loose. That contrast will tell you how much of your morning routine depends on putting the part in before the ends set.
Leave the roots loose while you check the bend. A collarbone edge keeps the ends long enough to gather at the nape.
Air-dry once with the hair inside your collar and once outside. The position can change the way the ends flip more than a new product.
3. Wavy shag with long fringe

Ask for a long fringe that opens at the cheek and continues into the wave. A shorter piece will spring sooner, especially near the temples. Let the stylist see how the front dries on a normal day before committing to a cut above the eye.
Decide how far down you want to see the first separate piece. A gradual change between the fringe and the ends can help them sit together. Ask to see the profile before taking more off at the crown.
4. Silver wave pixie

A short silver pixie can show one gentle bend over the forehead. Keep the top long enough to form it and take the weight out near the ears.
If your hair tends to wave only at the ends, leave enough on top to reach that point. A little hair can lie across the brow while the sides sit close enough to show the ears.
If a shorter top looks flat, try leaving one longer section over the part. It can keep the curve visible without adding much width.
5. One-length shoulder wave

If the waves look wispy at the ends, an intact perimeter can make the length easier to read. Keep the edge loose enough to move.
Squeeze water out with a smooth towel before adding product so the wave does not have to form again from soaking hair. The last bend will help show where you want the edge to sit.
Check the back in daylight if the lower layer looks thin under the top. Keep enough weight for the ends to meet when you pull them together at the nape.
6. Ear-tuck wavy crop

Lift one damp wave and see where it turns away from the ear. That is a place to leave length if you like the little flick.
Put your frames on after it sets so you can check the side without pressing it flat. Put the shorter section on the side you usually tuck.
Dry check. Ask for the front to clear your glasses when it dries rather than cutting it to that height wet. Leave the crown longer if you want to see a wave there.
7. Wavy bob with a side part

Try the part on freshly washed hair. One side will often start bending closer to the scalp. Decide if you want that to be the full side or the tucked side.
The finished shape depends as much on that placement as on the layers. The center may look a little open while your long side still feels full.
Try setting the part before the stylist starts. At home, give the fuller side enough room to dry without pushing it back behind the ear. Give the longer side room.
8. Rounded bob with long layers

A long layer through the crown can give a soft bend some room. Keep the lower edge in one piece if your hair is fine.
Ask your stylist to show where the ends sit after they squeeze the water out and before they use a brush. A rounded profile may get broader where the ends turn up.
Look for the spot below the cheek that keeps that width visible. Ask for less layering at the sides if you’d like the edge to stay solid behind the ear.
9. Cheek-length French bob
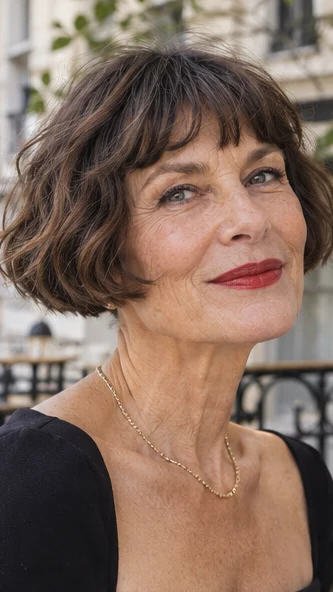
A short French bob puts the existing bend next to the face. If the wave bends out, let it. If you have to roll it under after every wash to get the profile you like, a longer shape might fit your routine better.
A cheek-length cut can be lovely if the hair already falls away from the face. Turn toward a side mirror after it dries. If the front turns straight across your mouth, keep a little more length there for a tuck.
10. Waves with a center-parted long fringe

Move the part until you can see the small space between the waves. If you wear a clip, check it on the side you tuck before the fringe gets shorter.
The two sides can still open at different angles and look natural. Let the two bends settle. Look at the window where the fringe divides.
Two distinct waves can create a nice opening. Check it in the morning without brushing. If one side curls inward, leave enough length to push it aside before it reaches your eye.
11. Soft U-shaped cut for waves

A shallow U gives long waves a little room beside the neck and keeps the bulk of the length at the back.
Wave cue. Ask for a rear view while the hair is dry. A deep U can leave the forward pieces looking thinner by comparison. Try wearing the waves forward in your usual shirt.
You’ll see which ends reach the collar and where the U gets lost. Keep the slope shallow when you want the front and back to look like the same length from the side.
12. Brushed-back wavy layers

Sweep the front back while the roots are damp and leave the ends to curve on their own. If the front won’t stay open, use a small clip while it dries. Remove the clip after the root has cooled and dried.
A soft hold at the root is enough for some wave patterns. Test the shape after the clip comes out and let the loose ends move with it. If the front drops, straighten the part before pushing more hair back.
13. Wavy bixie with open ears

Keep enough on top for the wave to separate into two or three pieces. Short sides keep the shape visible from behind. Show the stylist where your glasses rest, since a short back can still leave a thick patch pressing against the frame arms.
A short back shows where the crown layered pieces end. Ask the stylist to leave a little more of the wave above your part if you want the shape to show from the front. Check the side with your glasses in place.
14. Air-dried collarbone layers

Watch the ends for the first few minutes after a wash. If they turn inward just as the top dries, put your part in early and leave the lower layers loose. Take that kind of reference when you go back for a trim.
Long layers are easier to judge when you can see how the hair lands after drying. Bring a front and side photo. If the short pieces straighten as they dry, ask if the existing weight is what makes your lower wave visible.
15. Long waves with a solid hem

Try one clean line at the bottom if the pointy ends are the part you dislike. Leave the layers around the face, where you can see them when the hair is forward.
A solid edge can show the last bend instead of leaving thin wisps below it. Keep the shortest front piece far enough down that it doesn’t start its own little flick above the rest.
Wear your hair over both shoulders and see if the edge hangs evenly. Let one side stay loose if it naturally dries that way.
16. A soft wavy crop at the nape

Let the back follow the direction the hair grows. A wave that lifts at the nape can spring past a straight clippered edge. Ask for a dry mirror check if the growth there changes directions from one side to the other.
A soft nape lets the lower bend move without looking like a step from the side. Keep the length near the part if you want to clip the crown back. Look behind both ears after a wash to see where the outline lands.
17. Wavy cut with a diagonal fringe

A diagonal fringe can follow a natural sweep across one brow. At home. Let it dry without touching it in the chair.
If you have to hold the front down to show the line you want, leave it a little longer and reassess after a wash. Check which brow you would like to see under the diagonal.
One side may lie lower because of how your hair grows. If it covers your eye when you look down, ask the stylist to show you a slightly different part first.
18. Shoulder waves with internal layers

Longer outside layers let the waves read as a whole before they spread near the shoulder. Feel the thick area underneath with your hands and show that spot.
A side or rear photo can help if the bulk is hard to see from the front. Internal layers can loosen a bulky section while keeping the edge fairly intact.
Point to where the hair feels heavy rather than requesting layers everywhere. If you wear a low ponytail, preserve enough length to gather the hair at the front.
19. Side-swept wave with a tucked temple

A tuck often presses the wave flat on one side. Keep the other side long enough that its curve still shows when you put on your glasses. A small flat clip holds the short side in place without creating another thick bend at the temple.
Look at the side with the glasses on, then slip them off without moving the part. If you like the fuller wave more when the glasses come off, preserve enough of that wave to lay it back down after a tuck.
20. Wavy bob with a natural outward flick

If the ends turn out at the jaw, work with that direction. Use the fingers to separate two or three pieces and stop before the wave opens into frizz. The flick needs some room, so check it with a turtleneck before choosing the final length.
The outward bend may be strongest after a few steps outside. Give it time to come back before you decide if the ends need another brush pass. A small gap above the collar can keep the two sides from changing shape as you move.
21. Midlength soft shag without bangs

A shag can get its movement from the layers at the cheeks and crown. Leave the front long enough to put back on days the wave drops.
Ask the stylist to take less off the bottom if you want an edge you can see in a side photograph. Let the shortest side pieces sit near the cheek instead of forcing them into a brow fringe.
A few layers under the top can give them a little room. Keep enough length at the bottom to tie back if you want to take it off your neck.
For more ideas, see the guide to short haircuts for fine hair.
Further reading. Ouidad on styling curls and waves.
The portraits are AI-generated illustrations of the featured looks.