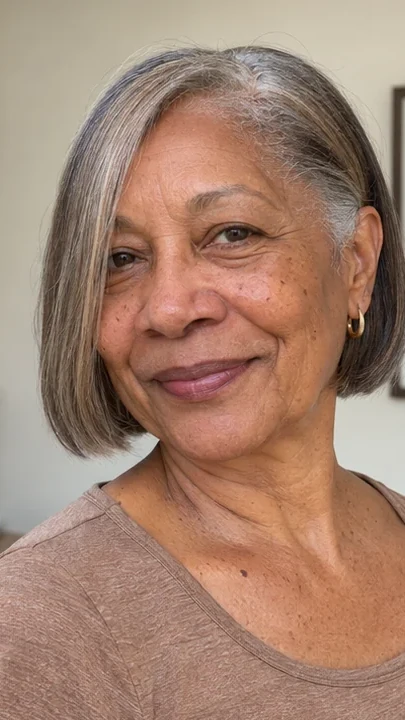
23 Short Haircuts for Women Over 60 With Fine Hair
Look at a short haircut from the side before you fall for it from the front. A silver bob at the jaw looks quite different from a pixie that leaves an earring in view. The side tells you where you’ll feel the change.
These 23 short haircuts for women over 60 with fine hair cover the decisions a salon photo can leave out. Some leave enough hair to tuck behind your frames. Others save you the trouble of getting a brush through the back.
Fine describes the width of a strand. Density is how many strands grow in an area. If you have a lot of fine hair, you may have enough to play with short layers. If you see scalp at the temples, keep length there.
- Part check: Let your hair dry where it falls on its own. Note where you can see more scalp.
- Ear check: Tuck one side back. Notice how much hair you want to keep in front of the ear.
- Collar check: Put on the jacket you wear most. Decide if you want the nape to clear the collar.
Find your short haircut
Pick your texture and the amount of styling you want to do. You’ll get four cuts to compare.
Straight · fingers or air-dry
Straight · brush or diffuser
Wavy · fingers or air-dry
Wavy · brush or diffuser
Curly or coily · fingers or air-dry
Curly or coily · brush or diffuser
1. Blunt chin bob
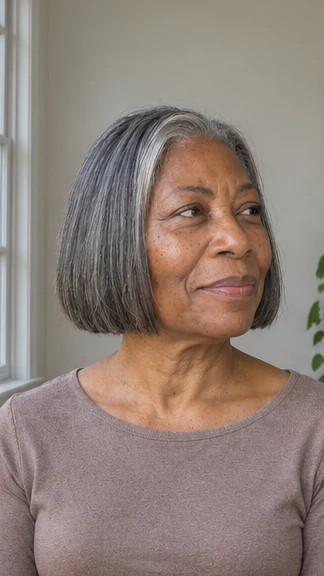
A blunt bob can look quite different depending on where it stops. At the chin, the salt-and-pepper ends trace the jaw like a pencil line. Wear it with the collar of a shirt open to show the full outline of the cut.
Salon note: Ask your stylist to comb the hair down before you agree on the length. If you see gaps through the bottom inch, consider setting the edge a little higher. Leave enough on your preferred side for an ear tuck.
2. Side-parted jaw bob
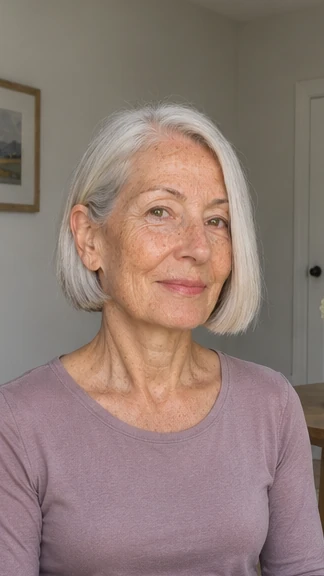
Part a silver bob one finger off center and you get two different views. On one side, the tucked hair leaves room for an earring. On the other, a smooth panel drops beside the cheek, with the silver catching the light.
Try the part at home before the appointment. The extra hair on one side changes where the ends meet your jaw. If you find yourself moving it back by lunchtime, show the stylist where you’ve been parting it for years.
3. Ear-length French bob
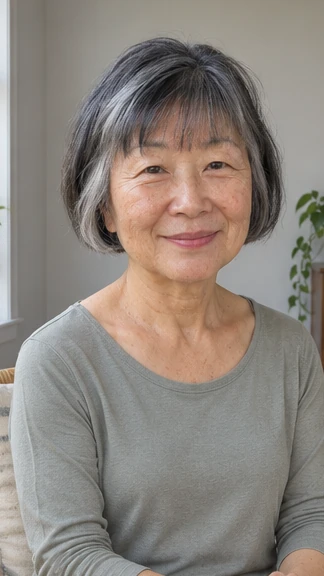
The short fringe makes this French bob sharper than its rounded sides suggest. The black strands give the silver ones definition at the edge, and the ends leave a sliver of neck in view.
Keep the fringe section shallow if you want hair left at the temples. On wavy hair, check the length once dry.
Fringe tip: If your bangs split down the middle, wet the roots and brush them across your forehead in both directions before they set.
4. Short angled bob
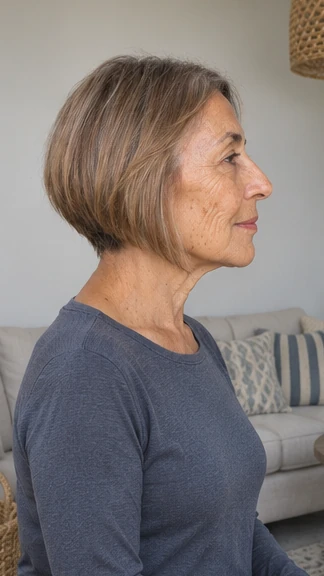
Look at this light brown bob from the side. The back curves up at the nape, then the front tapers toward the chin. That slope gives a long coat collar some breathing room while keeping hair beside the face.
Choose a modest angle if your front pieces get thin near the ends. In the salon, put on your glasses and try tucking the long side before the final trim. You’ll know how those pieces sit in your daily routine.
5. Soft stacked bob
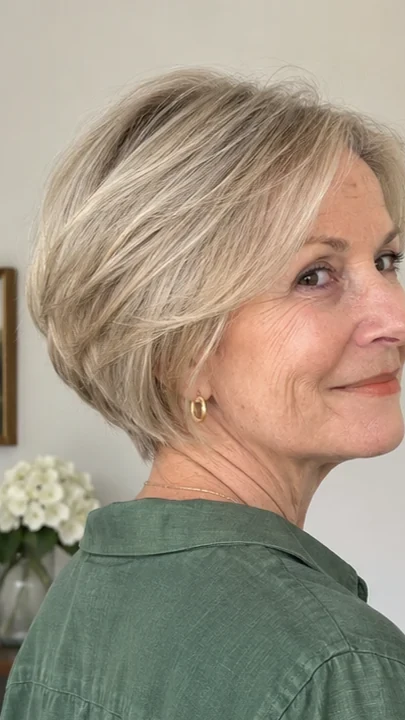
The best part of this ash-blonde bob is the view over the shoulder. The ends roll close to the neck, with a little fullness above them. The crown can lie where it falls.
Check the height of the graduation in a hand mirror. A high stack can leave a shelf as the shorter hair grows.
Drying tip: Lift the damp roots at the back with your fingers. If you use a round brush, give the last inch a slight turn under.
6. Bob with wispy fringe
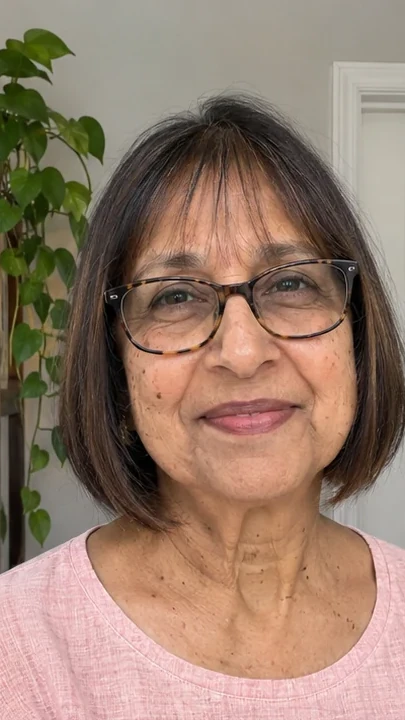
Dark brown ends and tortoiseshell frames draw two strong lines across the portrait. The fringe is lighter in between, with the brows still visible through the hair. A narrow section at the front leaves more hair beside the cheeks.
Glasses check: Bring the frames you read in. Tilt your head down and look up through the lenses as you would over a book. If the hair brushes the rims, take the center a little shorter or sweep it to one side.
7. Wavy crop bob

The sandy pieces around this woman’s cheek bend in loose S shapes. That curve gives the cut its shape, particularly on the side that sits away from the ear. Leave enough length for one bend to form.
If you wear your hair air-dried, bring a picture of it after a normal wash. It helps your stylist judge how high that first bend will sit. Work a little foam through the damp bends if they need help holding their shape.
- For an existing wave: let the sides set before you tuck them.
- For a bend that falls flat: ask if the cut can keep more length at the cheek.
8. Jaw-length curly bob
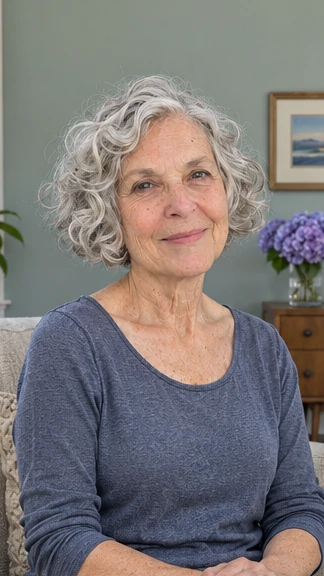
The silver curls in this bob have room to hang in small spirals along the jaw. Leaving some weight at the bottom keeps a few longer curls from dangling below everything else. Shorten a curl or two at the crown if that area lies flat.
Curl check: Arrive with the finish you wear most days, then check the length dry. If you tuck one side behind an ear, try it in the chair. A curl might pull back over your glasses once you let it go.
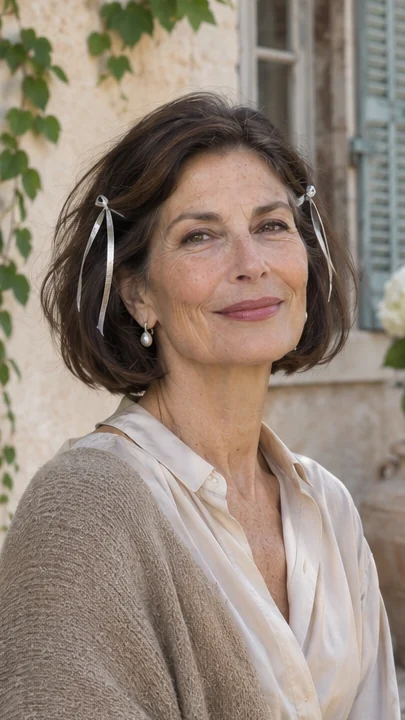
9. Rounded Italian bob
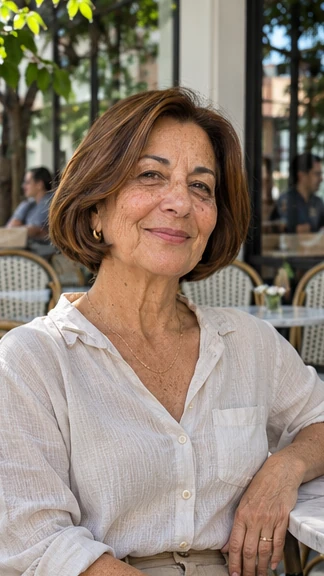
The ends of this warm brown bob turn in near the jaw. That rounded finish, an open forehead, and enough weight to see the edge are what make it read as a cropped take on the Italian bob.
It works if you enjoy the feel of a round brush under the ends. If your hair dries with an outward kick, you can leave it that way for a different silhouette or spend the extra minute turning it under.
10. Chin bob with curtain fringe
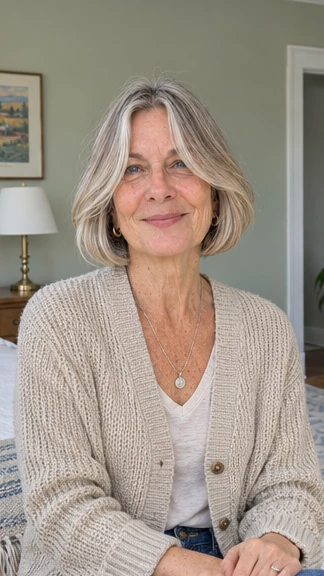
Long curtain bangs are a useful change if you already like your bob. Here the gray-blonde pieces start close to the eyes and sweep out toward the cheekbones, leaving the chin-length edge in place. Keep the center open.
Ask for enough fringe to push it behind your glasses when you read. If the front of your hair grows straight down, have the stylist show you the brush movement before they shorten it. See how long it holds through the appointment.
11. Side-swept pixie
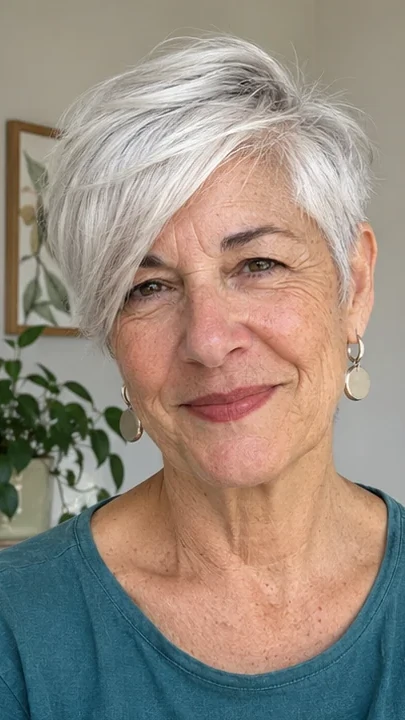
A white side-swept pixie and a pair of drop earrings are a good match. The shorter side clears the ear, while the fringe crosses the forehead in one loose sweep. Follow the part you have if the hair at the front grows to one side.
Keep a little length at the temple if you want coverage on the side with the fringe. To keep a fine section from clumping, rub a trace of wax between two fingers, then touch the ends that won’t stay put.
12. Tapered pixie
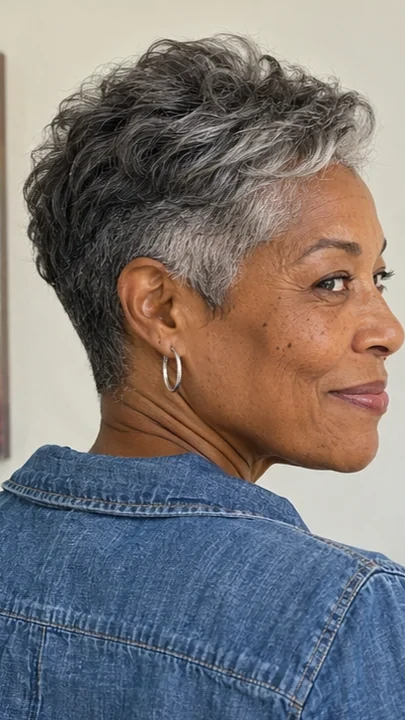
Look at the back of a tapered pixie before you choose the shape on top. On this salt-and-pepper cut, dark waves collect above the crown and the hair narrows near the neck. There’s enough room behind the ear for a hoop.
Salon note: If your neckline grows unevenly, ask how a scissor taper would follow it. A square outline may show the unevenness sooner as it grows.
Put your glasses on for the last check. Look at the sideburns from both sides.
13. Cropped curly pixie

Leave enough hair up top for a silver curl to make one full turn. The shorter sides in this pixie sit close to the head, so the little loops at the crown show up even without much height.
Have the stylist check the shape once dry. Next-day reset: Mist the patch you slept on and squeeze it into shape with your fingers. Adding another layer of styling cream can weigh down fine curls if there’s already product in the hair.
14. Long pixie with temple coverage
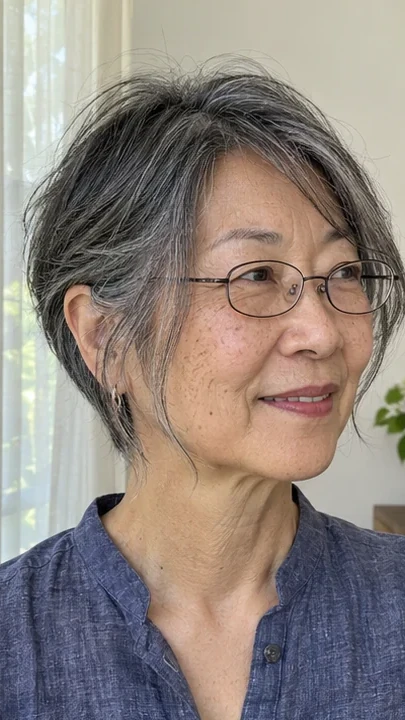
The long pieces in this dark silver pixie show what a few wisps can do for a pair of wire frames. One loose strand alongside the frame keeps the side from looking shaved back. The nape can still sit short.
Decide which temple you want covered before the stylist begins. If you tuck the other side, say so. The moment to check that the hair falls past the frame is after you’ve put your glasses back on and moved your head.
15. Brushed-forward crop
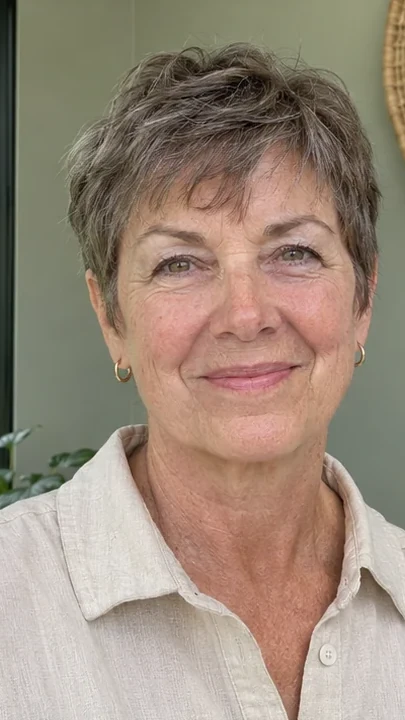
The uneven edge across the forehead is what gives this gray-brown crop a bit of bite. Hair grows forward from the crown, so the short pieces can settle toward the brows after a wash. Check that direction before copying the photo.
Let the stylist see the crown dry and point out any split you prefer to cover. Ask to leave a little length over it.
After washing, press the damp top forward with your hands. A comb can open the edge into wider gaps.
16. Close buzz cut
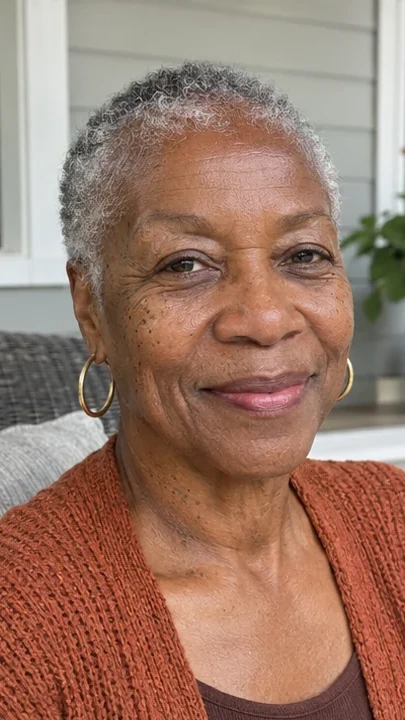
A close buzz puts the line of the hair and the shape of the head in full view. Look at the silver growth across the woman’s crown and the contrast along her temples. The gold hoops have a clean space around them.
Length check: Begin with a longer guard if you haven’t worn your hair this short. Take a minute to look at the coverage from above. You can go closer once you’ve seen how the hairline and scalp look under bright light.
17. Brushed-back pixie
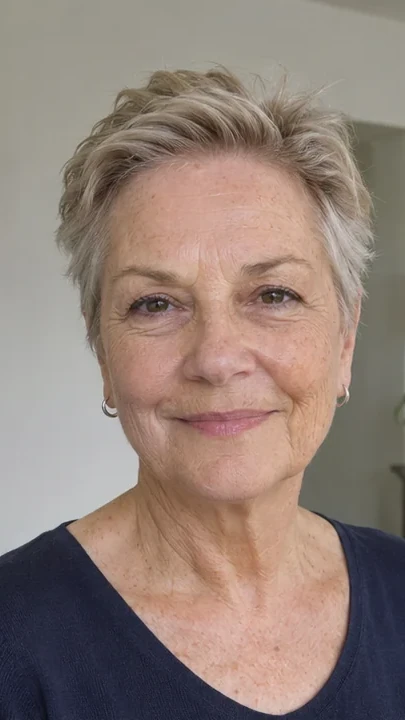
A brushed-back pixie leaves the forehead open without needing a severe line at the sides. The root lift in this gray-blonde cut is small enough for the head shape to come through. Try pushing the front back with damp fingers before booking.
If it drops forward the minute you let go, ask for a styling demo before losing length.
To set the bend at home, point the dryer back from the roots, then hold the hair there while it cools. Release it before you brush the sides.
18. Undercut pixie with a long top
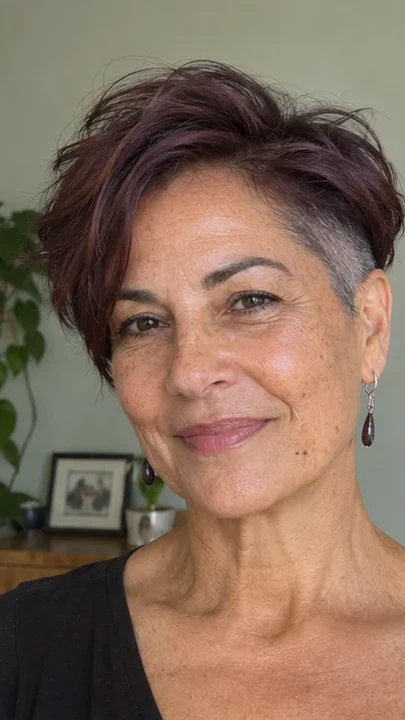
The short silver panel above one ear is the part that makes this cut. The longer plum-brown pieces swing across the top and give the color some depth. Fine hair can wear an undercut if there’s enough coverage over the clippered area.
Have the stylist hold the top up and point to the proposed line before clipping. A narrow section leaves more hair to work with. Ask how the short patch will feel as it starts growing down over the ear.
- Show the short side by sweeping the top away from it.
- Cover the clippered patch by wearing the longer section over it.
19. Long-fringe bixie
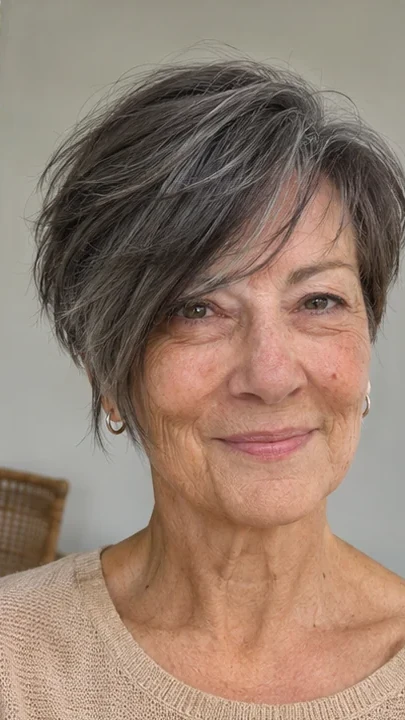
There’s a touch of the bob in the charcoal fringe that falls near the cheek. Turn to the side and the bixie gets shorter at the ear and nape. It’s one way to keep a soft front while giving up some length.
Bring a side view if you’re planning to grow the pixie into a bob. Decide how much ear you want to see for now.
Dry the fringe before the crown if it tends to fall into your eye. That gives the part time to set.
20. Short soft shag
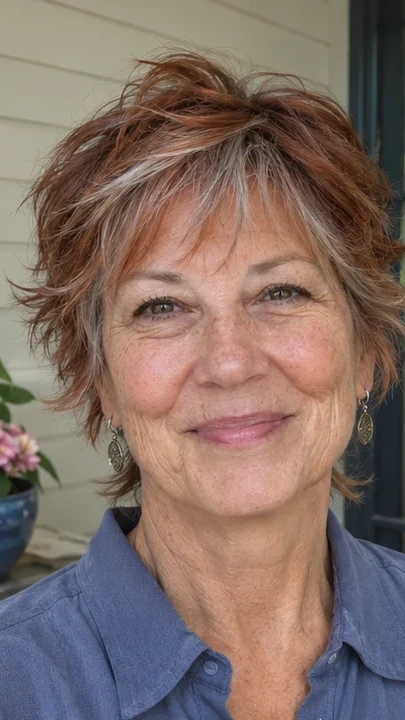
Copper and gray show through the little bends along the crown of this short shag. The ends flick near the ears, and a few longer pieces sit at the neck. It suits fine hair with enough density to spare some length for layers.
Drying tip: Scrunch a small dab of foam through damp waves, then leave the ends alone while they set. If the outline already looks thin, ask for fewer layers near the bottom so you can still see where the cut ends.
21. Rounded coily crop
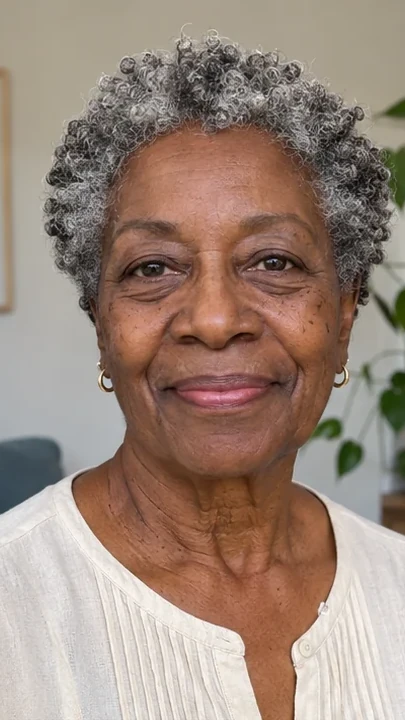
Those small salt-and-pepper coils make a round outline with spaces between the clusters. If your crown draws up higher than the sides once dry, a touch more length there can keep the shape in proportion.
Ask for a dry check with your hair set the way you wear it on a normal day. Look at the outline from both sides.
For the next morning, mist any patch that flattened against the pillow and coax the coils apart with your fingers.
22. Short asymmetrical crop
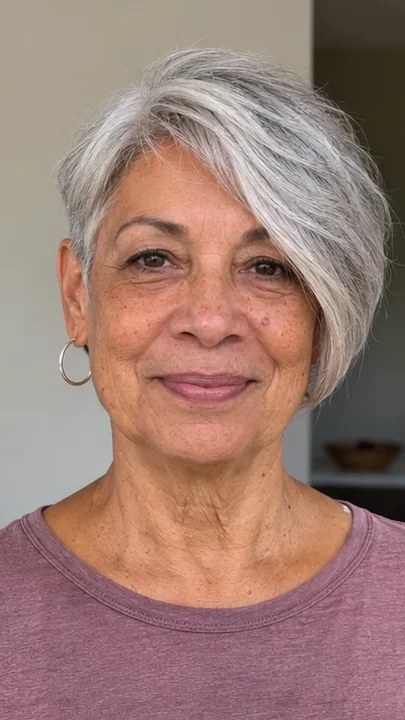
In this silver crop, one ear is bare and the other side reaches toward the cheek. The longer sweep catches the light across the forehead. Put the shorter side where you already tuck if you like having one side out of the way.
If the side you want to keep long is sparse, ask the stylist to take a smaller step between the two lengths.
Bring a front view and a profile. The front shows the difference, and the side shows where to clear the ear.
23. Bowl-shaped crop with a soft edge
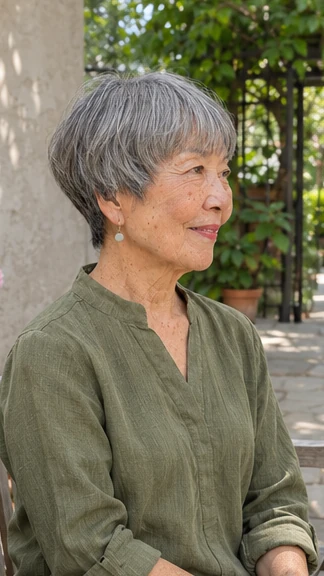
The curved gray fringe on this crop has the outline of a bowl, with a broken edge by the temple. In profile, look for the neat nape and the little sweep in front of the ear.
For fine, straight hair with even coverage, that curve can settle into shape with a few brush strokes. Ask for room around a strong split in the fringe.
Trim cue: Book a fringe tidy once the ends touch your frames. The rest can wait if you still like the outline.
Before your appointment
Take two pictures to the salon. In one, pick hair that falls the way yours does after a wash. Use the second for the side or the back. That view often settles the question of how much neck you want to show.
Wear your everyday frames to the appointment. If you air-dry, ask what shape you can expect on a morning when the dryer stays in the drawer.
Frequently asked questions
Do short layers make fine hair look fuller?
A few layers can give the crown or a loose wave room to move. If the ends are already sparse, too many layers can make the edge harder to see.
Ask where the weight will sit. If you want to keep a firm outline, see Hair.com’s guide to cuts for fine and thin hair for a stylist’s take on blunt ends.
Does fine hair have to be cut above the chin?
No. Start by looking at where your ends still look substantial. If that point is below your chin and you like being able to tuck both sides, there’s room for a longer bob.
Ask your stylist to show you where the length would sit once your hair dries.
How often should I trim a short cut?
Book around the point where the cut starts bothering you. That could be the first week the fringe touches your frames or the nape starts catching on a collar.
A close crop will show growth sooner than a loose bob. Ask about a fringe or neckline cleanup between full cuts.
How can I wake up fine curls without adding more product?
Mist the sections that flattened overnight with water, then cup the curls in your hands. Let them dry before deciding if you need more product. Ouidad’s guidance for refreshing fine curls explains why adding more each day can weigh the hair down.
The portraits are AI-generated haircut illustrations.



12 Comments