25 Shoulder-Length Hairstyles for Women Over 60
Take your favorite coat to the salon if you live in it. An edge that falls nicely over a T-shirt might kick out at the shoulder as soon as you put the coat on.
These shoulder-length hairstyles for women over 60 give you several places to set the edge. Some clear the shoulder and others sit low enough to gather at the neck.
1. Rounded shoulder cut for natural waves
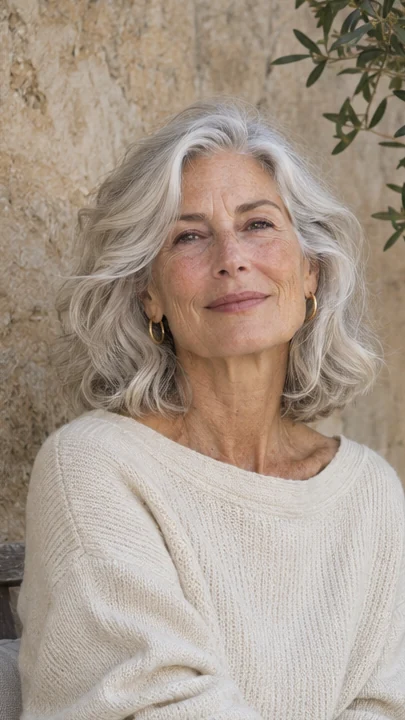
Let the last wave land just above the shoulder so it can turn under without sitting on the collar. Keep the layers long enough for the curve to form.
Bring a photo taken after an air-dry so your stylist can see which side starts to bend first. The curve gives the bottom an outline without closing it into a stiff roll.
Turn to the side and see which ends sit on the shoulder. Check that line with the layer you normally wear underneath a jacket.
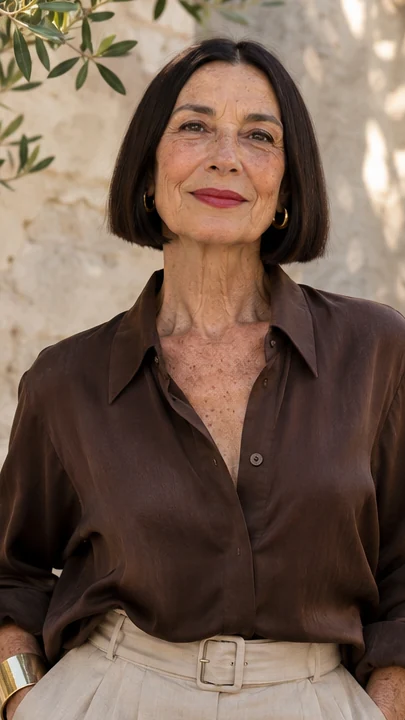
2. Blunt collarbone lob

Ask for the bottom to look solid once dry, especially if a strand on one side curves sooner. A light pass with a flat brush can keep the ends together, but leave the line where it falls if you prefer to dry without one.
A dark lob with a straight bottom looks different over a T-shirt than over a high collar. Try both before you settle on the length.
If the ends push up on your sweater, take the edge slightly above the fabric or leave enough length for it to fall past it.
3. Wavy shag with a soft fringe
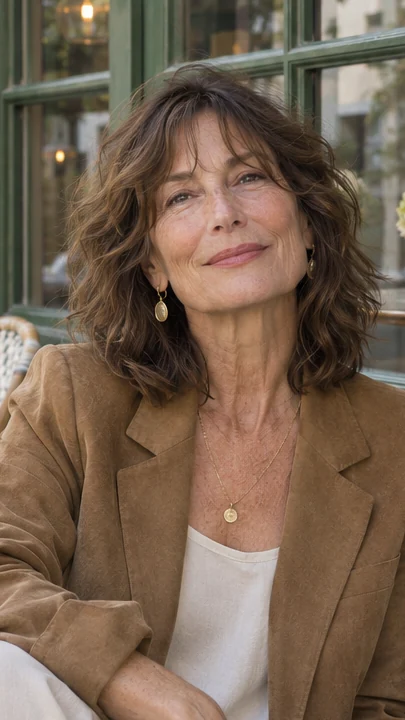
The fringe of a shoulder-length shag can sit lighter than the sides, where the longer strands still form a full wave. Keep a little weight along the bottom if your hair is sparse.
Ask your stylist to cut the short face pieces after checking the dry wave. Look at how the fringe separates where the front wave starts.
If the ends get wispy beneath the shorter pieces, leave more length in the lower half. Sweeping the bang to one side can make it easier to keep the rest of the wave in view.
4. Layered shoulder cut for loose curls
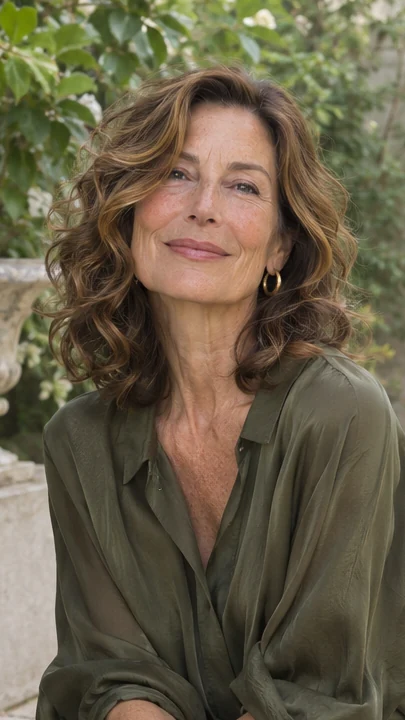
Let each curl fall where it wants to sit. The shorter pieces can start around the cheek while the longest layer touches the shoulder dry. Have the back checked after drying too.
It may hang lower than the sides even when the lengths match wet. A curl beside the cheek can sit higher without making the ends look uneven.
Bring a side photo to show where you like that change. When the curls dry more slowly at the back, let that area finish before the last check in the mirror.
5. Brushed-back gray layers
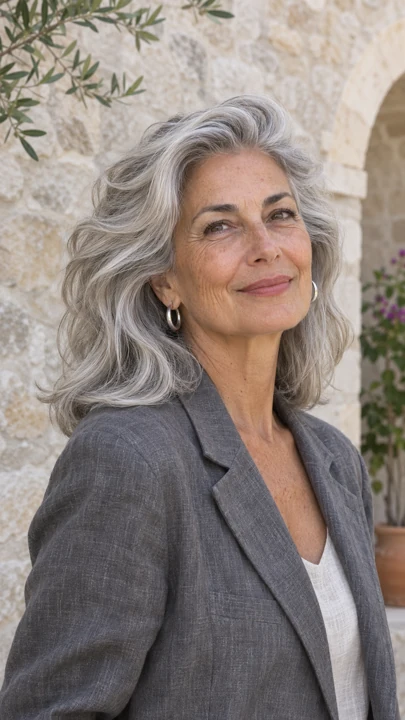
Silver shoulder-length hair shows movement when you sweep the front away from the face. Leave the shortest layer long enough to tuck if the lift drops. To set it at home, push the roots backward while damp and hold the bend as they cool.
Look for a change in direction beside the brow rather than extra volume above it. The layers show when a few ends sweep backward and the rest sit near the collar. Use a small clip at the root if the front falls during drying.
6. Flicked honey-brown ends
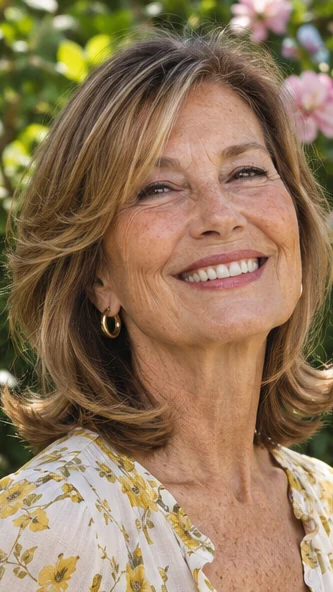
A shirt with an open neck gives the flick a little breathing room. Keep the first bend below the jaw if you want the top to lie smooth.
Finish from one side to the other so the earlier ends have time to cool. An outward flip gets easier to see when the ends have room to lift off the shoulder.
Length check. Use a narrow brush to turn the bottom inch away from the neck. If you want the whole cut to air-dry, see how the ends sit against a jacket collar before adding layers.
7. One-length shoulder cut with a side part

Moving the part shifts where the hair sits against each shoulder. If you tuck a side, check that the exposed edge still has weight. Bring the stylist a photo from the front and another with the hair parted on the side you plan to wear.
Set the part before you look at the line from behind. A part moved after the cut can change which strands reach the shoulder. Let the side you wear down keep its weight so it still reads as one edge.
8. Long curtain fringe on a lob
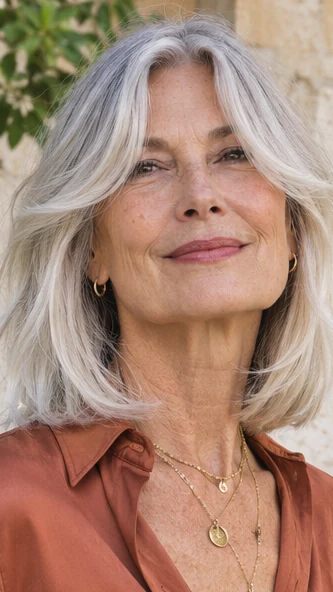
Keep the shortest piece around the cheekbone if you want the sides to push back out of the way. A long curtain fringe can still look full over glasses with the ends swept to the side.
Ask what it does on the day you skip the dryer. Dry the fringe first if you want it to open at the eyes.
You can hold one side back with a clip while the lengths dry. Leave a little space at the corner of your glasses so the piece doesn’t trap the arm when you put them on.
9. Shoulder-skimming cut with cheek layers

One short section near the cheek can change how the whole cut sits with a center part. Leave a gap between that section and the longer ends if you want it to stand out.
Have the edge checked with the shorter strand tucked, especially if you wear glasses. The cheek pieces should still look like part of the cut when you turn your head.
Show the stylist how far you usually tuck each side. Leave the longest section below the jaw if you want to get it behind both ears.
10. Soft U-shaped shoulder cut
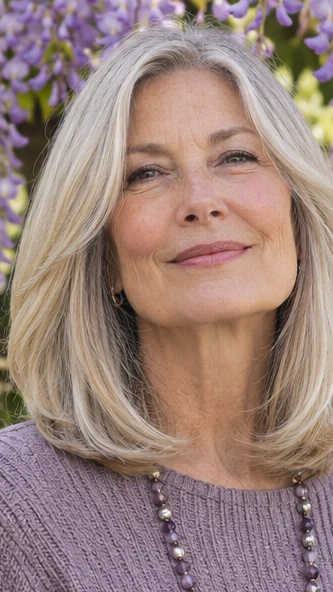
Wear the hair loose over a collar and check where the shorter sides stop. This shape works well when you like more length at the back but want the front to look open.
A small change can show even when the hair is worn straight. The back of a U-shaped cut holds length in the center, with shorter ends along each side.
Compare the shape in a hand mirror. If you wear the hair forward over a shoulder, a deep U may show more difference from side to side than you want.
11. Collarbone cut with tucked ends
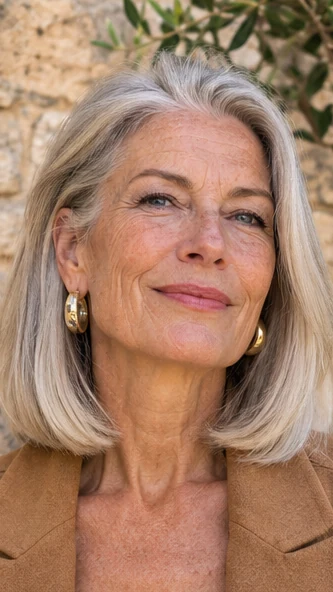
Turn the ends under just enough to keep them clear of your coat. Brush note. A large brush gives a wide bend, so the hair does not curl into a tight roll.
If you wear a side tuck, use less bend near that ear so the ends still sit together. A rounded finish can keep the bottom from spreading into a broad line over a jacket.
Use a little bend under one side at a time. Check that the ends still look full at the point where you turn them inward.
12. Side-swept lob with a long fringe
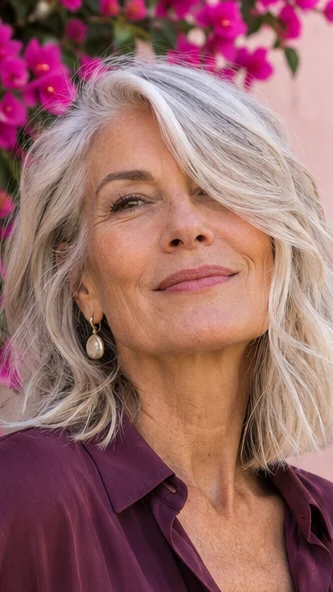
Comb the fringe across while it is damp and decide where you want it to stop. An end at the cheek can tuck back when you read or drive.
If it falls into your eye, dampen the roots before adding any paste to the ends. Start the part a finger away from the center if that’s where the root settles.
Avoid cutting the whole front to match one strand that keeps falling. The rest can stay long enough to pull beside your face when you turn.
13. Shoulder-length cut with hidden layers
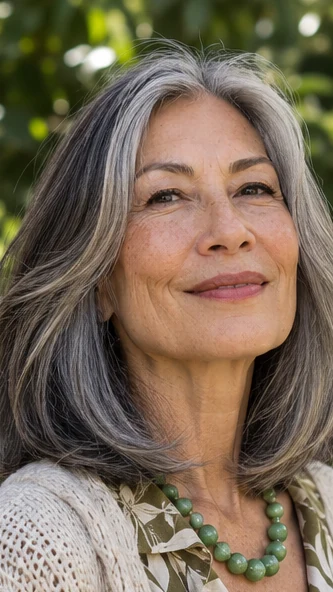
A few shorter pieces inside the shape can remove some bulk without breaking up the edge. Ask to see where the stylist plans to work. If you wear hair pulled back, keep those sections long enough to reach your tie or choose a softer trim.
Ask the stylist to lift the surface and point out the heaviest spot before cutting. This matters when there’s more hair at the back than the sides. Try a low tie to see which layers would have to sit outside it.
14. Collarbone curls with a center part
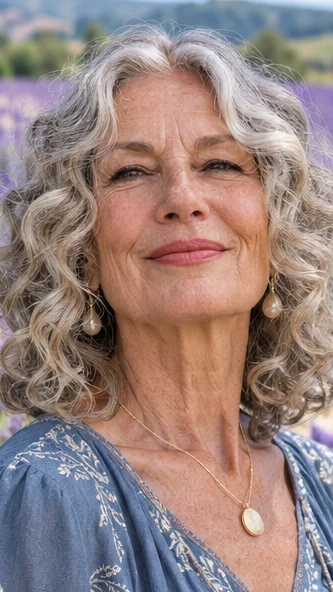
The shape should look balanced after the springier side catches up. Compare the two sides when you’re standing rather than leaning toward the sink. Tuck one if you like an open ear and check how much length remains on the untucked side.
A center part lets both sides fall across the shoulders. If one side coils faster than the other, ask for the dry shape to guide the final trim. A matched pair of wet sections may look uneven once they bounce back.
15. Short-to-long angled lob

With a slight angle, the front can reach the collarbone while the back clears the neck. This works for readers who tuck one side but dislike hair pressing above a scarf.
A strong angle needs more attention as the back grows into the shoulder line. Look at the gap between the hair and the nape on the short side of the angle.
That gap lets a scarf sit higher. Leave the longer front far enough forward to show the shape even when you’ve tucked the other side.
16. Shoulder-length bob with a narrow fringe
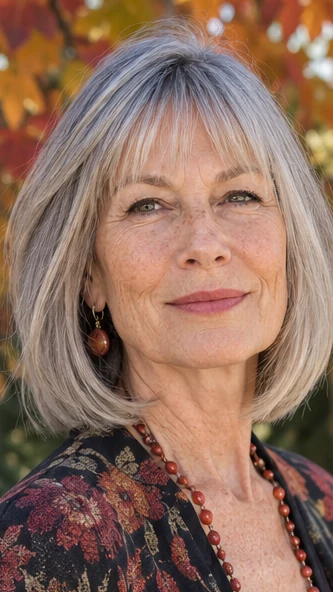
A narrow fringe can sit above the eyes without taking much hair from the temples. Keep it shallow if you want the long sides to stay solid. Check it after drying, since the front can spring up while the rest of the cut stays heavy.
A shallow front section leaves room for the longer sides to fall forward. If your fringe usually splits, show the spot before it gets wet. A slight opening at the brow can work with the blunt edge at the shoulder.
17. Textured lob with a soft blunt edge

Leave the longest edges visible and let the top show a little movement. In the mirror. This cut suits someone who likes a light bend after a wash but wants the option of a straight finish.
Ask to keep the very ends thick enough that they don’t read as separate points. Show your stylist a back view of how the ends look on a normal day.
If they spread as the layers shorten, ask to keep the pieces near the perimeter a little heavier. You can loosen the ends with one pass of the fingers afterward.
18. Shoulder-length cut with a diagonal part

Check the new part after a walk or a few turns of your head. If the front keeps creeping back to the old line, it may need more length to settle.
Put the glasses on when you decide how much temple you want to show. A small shift at the front leaves the crown close to your usual part.
Try it with damp fingers before asking for layers. The new split can put more hair over one temple, which matters if you wear glasses with thick arms.
19. Rounded shoulder cut with a long cheek sweep
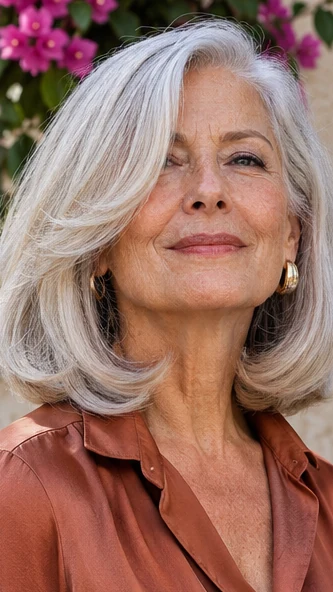
Have the stylist show where the front will meet the rounded edge. You want enough movement for a sweep beside the face without carving the sides too far back. Check that you can gather the hair at the nape if you wear a low tie.
Keep enough length lower down that a cheek sweep doesn’t turn into a separate fringe. Push it aside and check how quickly it falls back. A wide brush can give it direction without turning the rest underneath.
20. Swept-back shoulder layers for straight hair
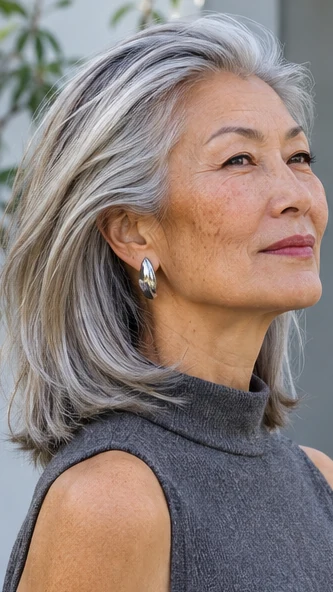
On straight hair, a wide brush turns the front out and leaves the length at the shoulder. Keep a small gap between the shortest layer and the rest if you want a visible sweep. Finish the front first so the roots do not set forward.
Brush the shorter front section away from the cheek and let the long pieces fall on their own. If the front looks too broad, use a smaller change in length between the two. A soft bend can still show against smooth ends.
21. Collarbone lob with a loose side wave

Create one loose bend near the eye and let the rest of the hair fall straight. It gives a simple collarbone lob a little movement for dinner without curling the entire head.
If you prefer air-drying, use your natural part to find which side takes the shape. A single loose wave gives the side enough shape to sit over the cheek without taking up much space.
Let it dry with one side tucked to see how different it looks. If it falls flat, use a clip at the root while the bend cools.
22. Shoulder-length cut for springy coils
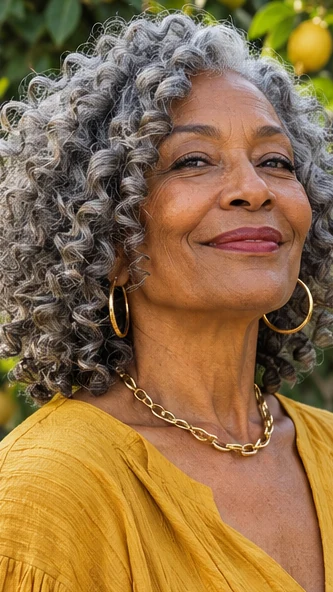
Look at the hair from both sides once the coils have settled. A photo made with the length stretched can give the wrong impression of where the cut will land.
If you want shoulder length loose and dry, point to that spot during the consultation. Pick your dry length before you talk about the wet cut.
Coils may land higher at the back of the head than they do at the sides. Show the stylist how you wear them after a wash and check that the perimeter still reads as a whole.
23. Shoulder cut with a full nape
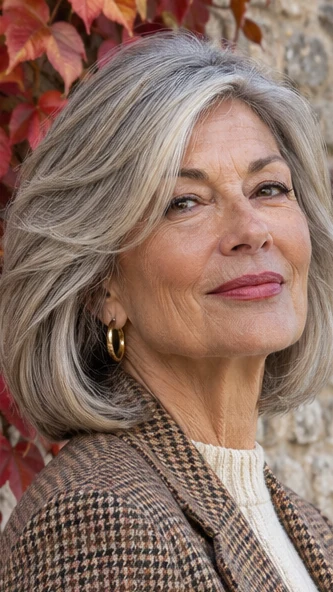
Keep the lower edge intact if you like the sight of a solid line from behind. Long layers can start above it to help the bend at the sides.
See how the bottom looks once it rests on your top, since the edge may flick in a T-shirt. Check the back with a hand mirror and decide how much outline you want against a high neckline.
A small lift at the side can work without changing the full nape. Leave enough at the bottom to see a clean edge.
24. Medium cut with a tucked face frame
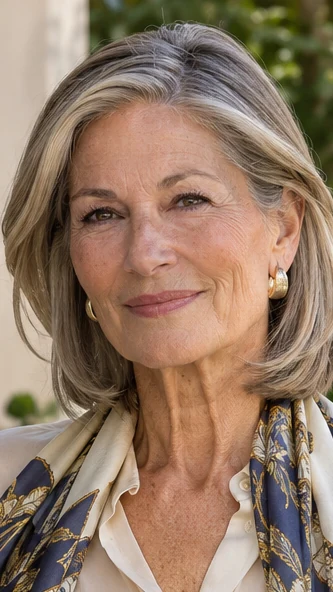
Leave enough length at the front to tuck without pulling the rest of the cut back. One shorter piece can still sit near the jaw.
Put on your usual earrings before the last trim to see where the hair and the jewelry cross. Take your earrings off and put them back on with the hair tucked.
If the same piece catches each time, have it placed slightly farther back. Wear your usual glasses if you have them, since the frame arms can change where a tuck sits.
25. Soft shoulder-length grow-out from a bob
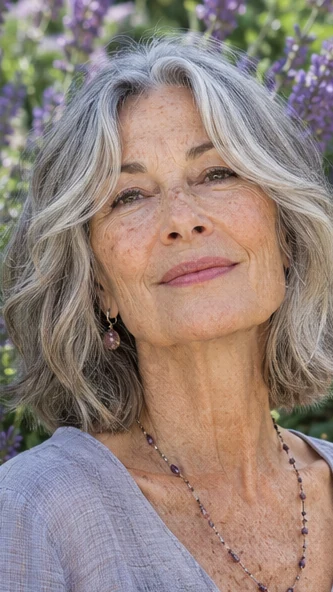
Let the back approach the shoulder while you keep the front off the collar. A small cleanup at the ends can carry a bob through this stage without removing much growth.
Decide how often you want to come in before you add a fringe or a sharper angle. Bring one photo from before the bob started to grow and one of the length you want next.
The difference helps show where to tidy without taking everything back up. Give the longest layers a chance to clear the collar before asking for more off.
For more ideas, see the guide to short haircuts for fine hair.
Further reading. Stylist guidance on layers and texture.
The portraits are AI-generated illustrations of the featured looks.