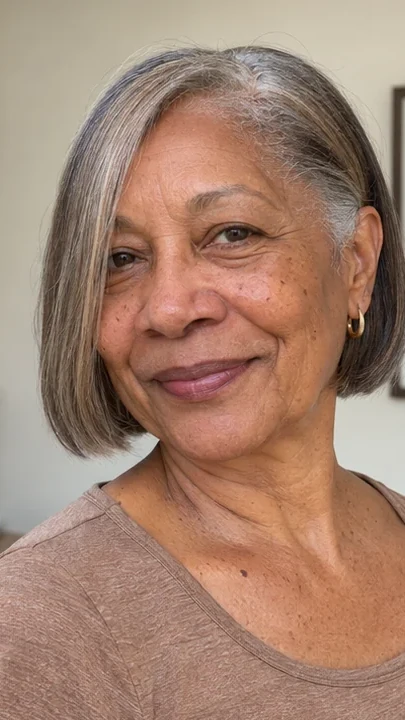
23 Haircuts for Women Over 60 With Thick Hair
Tell the stylist where you feel the weight. That might be behind your ears when you put on glasses, or down at the shoulder where the sides spread.
Thick hair can be dense or coarse. Show where you want the outside edge to stay strong before you discuss taking weight from the inside.
1. Long layered dark bob
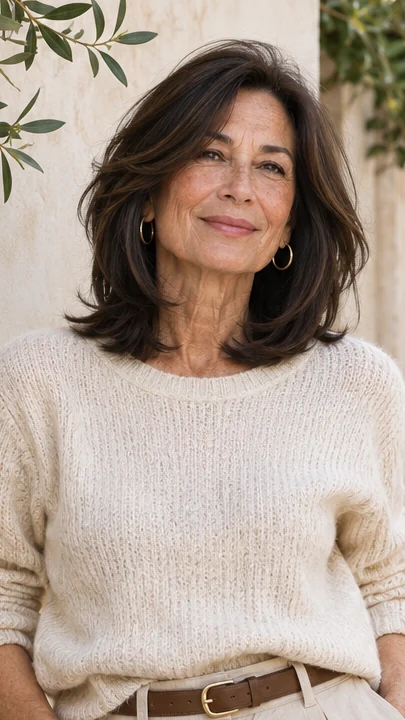
Lift the hair at the sides and check where the width starts. Ask to take weight from that area while keeping a clean edge below the jaw.
The longest layers can sit against the neck while a shorter front opens near the cheek. In the mirror, move the hair over one shoulder and see if the edge still looks solid.
If a side spreads as soon as it dries, leave that part longer and take weight a little farther back. A slightly longer edge at the front makes an ear tuck easier.
2. Shoulder-length U shape

A slight curve at the ends shows more when the hair hangs behind your shoulders. Bring the front forward for a second check before the cut is finished.
If you tie it back, lift that shorter front section toward the nape and make sure it still reaches the band. Leave the slope shallow if you like to wear the hair loose.
A shallow U can keep more hair at the back without making the ends at the front too thin. Check it with the hair over both shoulders.
3. Blunt lob with hidden layers
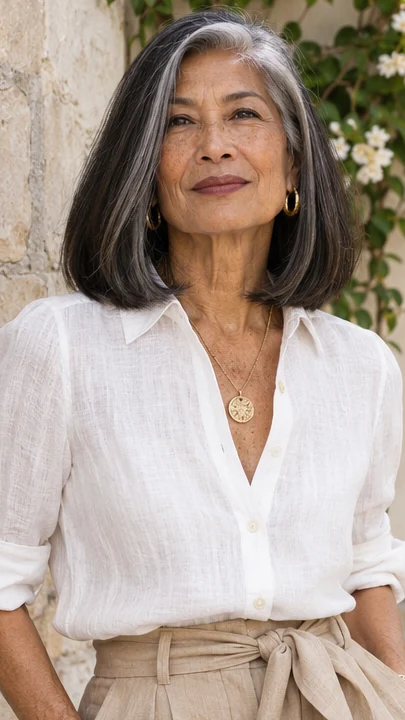
Keep the outside line blunt and ask about a few shorter pieces inside the shape. They can give the lower half room to move without visible steps.
The top should have enough length to rest over the shorter pieces. Point out where you notice the width first and ask for the change there.
When the ends dry, shake out the cut and look at the perimeter before asking for more hair to come off the inside. The edge may look fuller once it has cooled and dropped.
4. Tapered thick crop

Take most of the bulk out near the ear and keep some height above it. Ask what the nape will look like as it grows. Keep a little of the soft wave above the ear if you want the cut to show from the side.
Run your hand along the nape once the hair is dry to feel where the weight shifts. A narrow taper there leaves room for the crown to stay full without a tall ridge. Check that the shorter side doesn’t press the arm of your glasses.
5. Collarbone cut with long face pieces
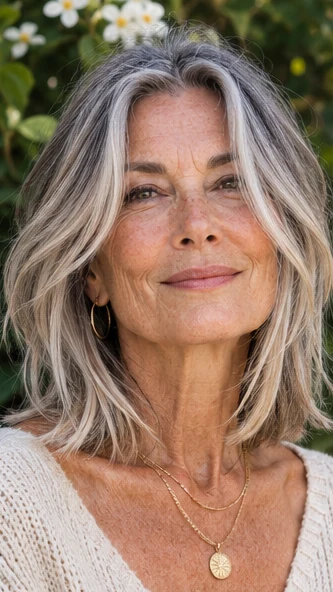
Leave enough hair at the front to tie back. A shorter face frame can feel heavy if it piles up in one section by the eye.
Bring the ends forward on both sides. The longer layers can curve inward beside the cheek and sit loose against a collar.
If your usual style is a low ponytail, ask for enough length to reach the tie when you’re looking straight ahead instead of lifting your chin. A few heavy ends near the back can keep the length looking connected.
6. Short stacked cut with a low rise

Have a look at the back in a hand mirror while the top lies where it normally falls. A low rise gives the nape some curve without building a shelf above it.
Keep the side near the ear a little longer if you want to slip it back on workdays. Put the collar down again to see the true line along the neck.
Keep the shortest layers at the nape. Salon note. If the upper layers get too short, the back can start to look like two separate shapes.
7. Ear-tuck bob with soft sides

Put your hair behind the ear before deciding how much to remove. A stylist can see where a thick patch blocks the frame arm.
Press the front flat with a finger once it’s tucked. If the sides still feel heavy, show the stylist the area behind the ear rather than removing the whole panel.
Try your usual frames without moving the part to check if there’s enough space for the arms to slide out. A softer edge there can stay open when you put the glasses on.
8. Long-layered shoulder shag

Leave the crown long enough to sit against your head after drying. The shape can get broad if the shortest pieces stand up. A long shag can keep enough length to flick at the collar while opening up around the cheek.
Look for the widest area in your side photo before choosing where to start the layers. If your exposed ends look thin, have the stylist leave more of the bottom alone. Let the wave settle for a minute before deciding if the crown needs more.
9. Asymmetrical crop with a soft edge

Shorten the heavy side only where you want the ear to show. Preserving some length at the temple helps the contrast look deliberate.
One small difference can show clearly if you leave the other side long enough to tuck. Try the shorter outline against your usual part and check it when you turn.
The fuller side may fall across the cheek even with the top brushed back, so set that length after your hair dries. One open ear will show where the difference in length starts.
10. Chin bob with a curved perimeter
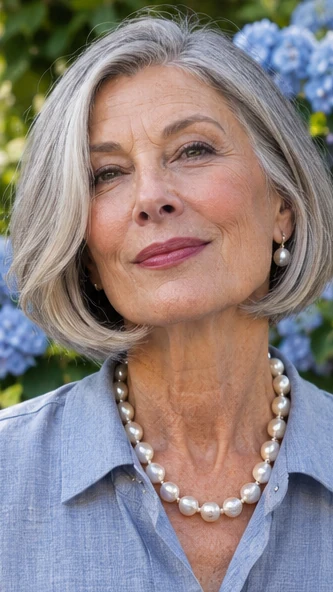
Let the edge sit close at the chin and turn just enough to leave space above the collar. A larger brush can give it that bend without a curl.
If you prefer to skip the brush, check where it turns on its own and pick a spot that still gives you a clear line.
Bring the ends forward to see how the two sides meet at the chin. A curved edge can hug the jaw without tightly rolling under it. Ask to see the ends after the brush comes out.
11. Shoulder cut with a long fringe

Take a smaller fringe section than you might need for fine hair. Daylight check. You can add more after you see how the first layer settles. A few separate pieces over the forehead can make the length look lighter from the front.
Put your glasses on before choosing the shortest point. Keep enough of the fringe loose at the temples to move it aside if it lands across a rim when you read. Let a slim piece rest at one temple to keep the change gentle.
12. Medium cut with layers under the crown

Internal layers can relieve weight near the back. Keep enough length through the surface so it can lie over those layers.
Check the fullness near the crown when the length is hanging loose. If the surface is dense enough to cover the short pieces, leave the outside layer intact.
Put your fingers under it and lift once after drying so the layers can fall without the weight sitting in one spot. A smaller change is easier to judge once the surface is back in place.
13. Long pixie with a narrow side panel

Wear the side panel forward or tucked. Have the stylist show you how thick it looks against the arm of your glasses before cutting it back.
A little hair beside the cheek is enough to keep a short cut from feeling bare when you take your frames off. Let the long piece sit near the sideburn instead of blending everything tight around the ear.
Find the line in profile before you agree to take more off. Choose a sideburn length that still looks right after the frame comes off.
14. Collarbone cut with a long round edge

The shoulder-length edge can sit slightly higher at the front and still feel full at the back. Put on a raised collar and turn your head to see where it catches.
Ask the stylist to shape the cheek area first if you want most of the weight near the lower edge. Leave the lower line where you can see it from the front.
Keep the ends substantial while letting the sides fall away from the cheek. Find the length with the hair over your usual shirt.
15. Short bob with a light bang

A small bang may be enough if your hair is dense. Check its line dry and ask which section it draws from before the stylist widens it.
Leave a small gap between the bang and each side of the cut. A fringe can still have a solid line on thick hair without taking a wide section from the sides.
Try it with the front dry and the back loose before deciding how much you want at the brow. Check the fringe with your head tipped down as you would while reading.
16. Soft angled bob

The angle can get more pronounced as the back dries and rises. Start with a small difference and look at it from the side.
A side view tells you how sharply the hair changes from back to front. If the angle looks much stronger after drying, you can keep it shallow at the next trim.
Test the long end behind your ear so you know if it stays clear of your cheek on windy days. Look again with both sides loose so the angle shows without a tuck.
17. Shoulder-length curls with layers

Bring a picture of your dry curl volume. Upkeep cue. Ask the stylist where they would remove weight without taking the length you use for a bun.
Choose where the fullest curl groups will sit when your hair is dry. Some can hang lower at the back without looking heavy against the shoulder.
Ask the stylist to show what would come off near the crown if you want a little less width through the sides. Ask for the dry curl groups to hang where they will at home.
18. Wavy lob with a soft tuck

A soft tuck gives the cheek space while enough hair stays out to show the bend. Tuck one side and let the other dry loose.
If a thick piece pushes the hinge forward, move the tuck a little higher before asking for more weight to come out of the cut.
Give the tuck room behind the ear instead of pressing the whole side flat. If one side feels broad, see what a tuck does before asking for shorter layers. Use a clip away from the hinge on thick glasses.
19. Medium wrap cut
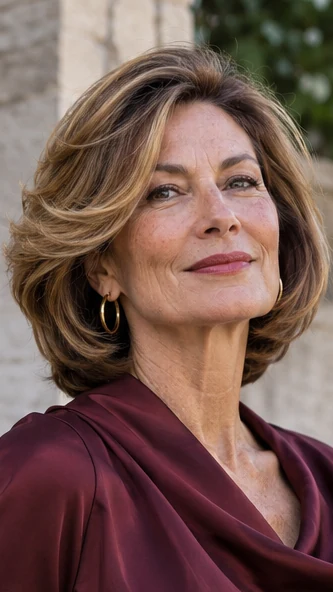
A sweeping top layer can sit around the cheek without needing its own short fringe. Check how it falls when your hair is dry and loose.
Let the long sweep start where the hair already bends near the part. You can bring the front back with a wide brush and then leave the rest alone.
If the shape starts to fall over your eye, secure the root with a clip while it cools. The length near the shoulder still holds its shape even if the sweep drops.
20. Close sides with thick waves up top
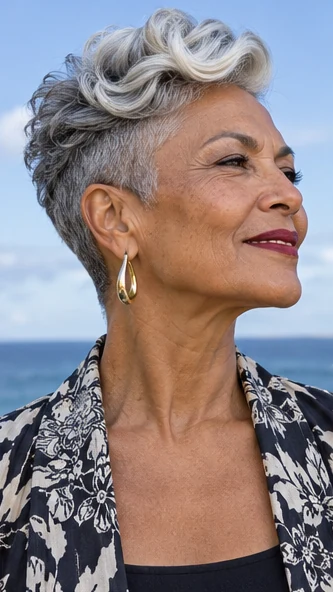
Leave enough on top to show the direction of the wave. The sides can follow your head without cutting the nape quite as close. Ask the stylist to show the wings of the cut around the ears while the top is still dry.
Leave the wave where it adds height at the front. A shorter section behind the ear can make the profile feel closer without reducing the curve above it. Tell the stylist which side you turn toward the mirror most.
21. Collarbone waves with an intact edge
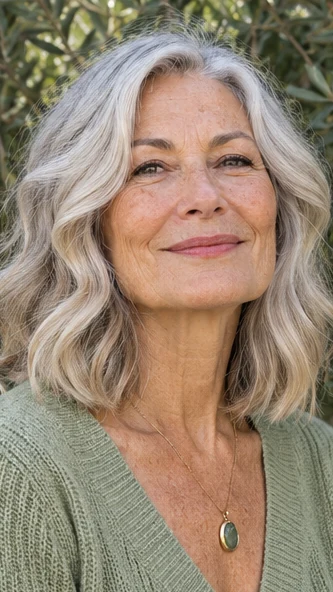
Let a few interior lengths move while keeping the lower line visible. If you prefer air-drying, decide from the dry bend where the edge should land.
Take a side picture with the ends resting against the shoulder. The hair can still show wave at the cheek while the bottom stays clear.
Keep the front pieces long enough to tuck if you prefer a more open shape when you wear a scarf. The ends can lie a fraction lower where the wave needs room to turn.
22. Long bob with a center part

A center part can show uneven fullness if one side has tighter waves. Let them dry before deciding which side needs a small change. A flat bottom is easiest to judge with your usual part, not with the hair moved around for the mirror check.
Let the stylist see how the top settles before the final check at the back. Check how much hair falls to each side of a natural part. Have the stylist compare the sides again after they have dried.
23. Soft crop with a narrow nape

Take the outline closer where the neck feels warm, while preserving more thickness beside the face. Keep the profile you like in the hand mirror. The shorter area at the neck gives a little breathing room under a high collar.
Leave enough length beside the ear to see the sweep from the front. Set the nape line when you’re sitting upright, then turn a little to catch the profile in the mirror. Ask for a rear view with the front left loose around the cheek.
For more ideas, see the guide to short haircuts for fine hair.
Further reading. Stylist guidance on layers and texture.
The portraits are AI-generated illustrations of the featured looks.