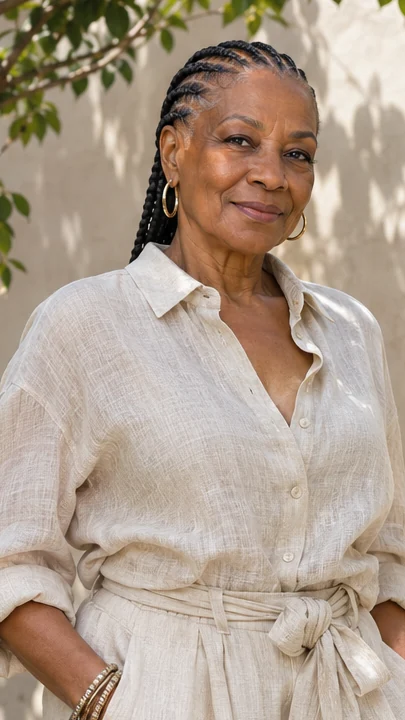
21 Two-Strand Twist Hairstyles for Women Over 60
Ask for twists you can sleep in and wear with a collar. The length, part size and placement matter when you plan to keep the style in for more than an afternoon.
These looks use natural coily textures. Start with a size and finish you can take down without pulling, and speak up if a section feels tight.
1. Short mini twists

Use small sections to keep the twists light and easy to part. Check how much scalp you want to see before setting the rows, since smaller sections can reveal the grid. Look at the outline you want before choosing the number of sections.
Short twists can gather near the crown without needing to pull the sides up. If the pieces at the hairline are shorter, leave a few where they fall. You can part the top with your fingers and still keep a round line near the ears.
2. Flat twists into a low bun
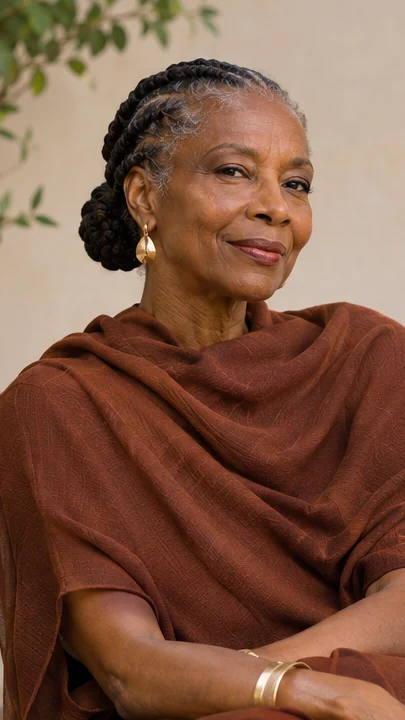
Start the rows where the front already divides so the part feels natural when the hair comes back. Let the bun sit a little lower if it pushes into your headrest. Check how much of the join you can see in a side mirror.
A flat pin underneath can hold it without winding the base tighter. Lay the twists toward the nape and gather them into a bun that rests off the collar. Keep the front comfortable when you move your eyebrows.
3. Shoulder-length chunky twists

Use wider sections if you want the twists to show in profile. Let the ends sit just below the shoulder so they can fall without pressing into the neckline.
Leave enough room between the twist ends and a raised collar to let them move. Put on the jacket you wear most often and see where the thickest end rests.
If the back feels heavy in a tie, try wearing the whole shape loose. A wider twist can still show its pattern without layers of added hair.
4. Pinned side-swept twists

Sweep the twists across the part and pin under the longest section. Keep the pins flat so they don’t press when you rest your head. A side sweep shows your part and gives the longer twists a place to fall.
Set the first pin where the sweep needs support, then let the remaining pieces hang. Check the angle against your glasses once they’re on. If a twist blocks the arm, move the pin a little above it instead of pulling back the whole side.
5. Medium two-strand twists with a center part
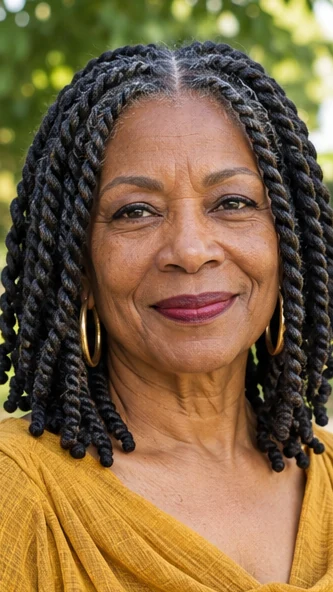
Set the part before twisting so you can compare the amount of hair on each side. A straight middle line makes the shape easy to see. Choose which twists you’d like to see when you look in profile.
A middle part can put the same number on either side while a couple still sit farther forward near your cheeks. Let both sides settle before arranging the ends.
If the part reads wider than you want, move one twist over instead of tightening the base. Look at the join under natural light before deciding if it needs moving.
6. Short twists with an exposed ear
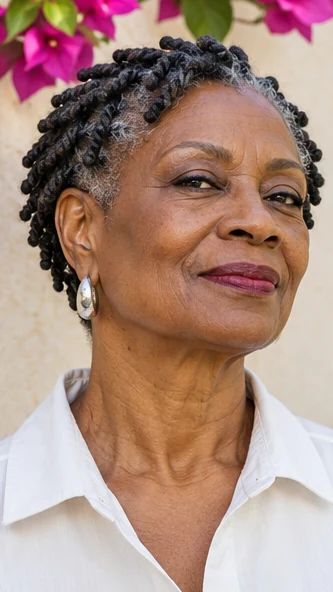
Place your earrings before choosing which twists to pin away from the ear. A thin post may sit clear while a larger hoop needs a little more room.
Keep the loose twists visible on the other side. Bring the pin forward if it presses while you hold a phone to the open ear. Check the angle once more when you’ve taken the frames off.
Choose the ear you want to show and leave a few twists free on the other side. Part check. Try placing pins above the frame arm if you wear glasses.
7. Mini twists in a low ponytail
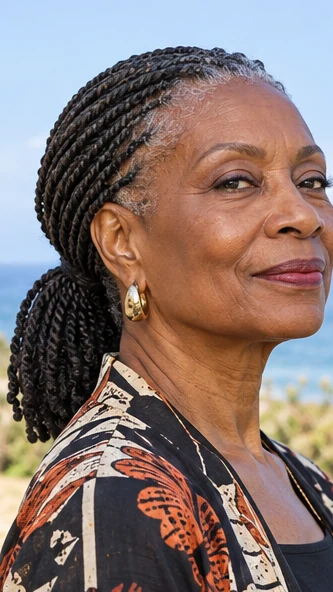
Keep the ponytail low and use a covered tie. Leave the shorter front twists loose if they need extra pull to reach.
Choose a tie size that lets you gather the length without having to draw it tight. Let the smaller front twists sit near the cheek if they don’t reach the base.
Check the length over a shoulder. If you want a quieter outline at the neck, fold the longest ends under with a pin. Leave the end visible if it still sits against the collar without catching.
8. Face-framing twists with curled ends
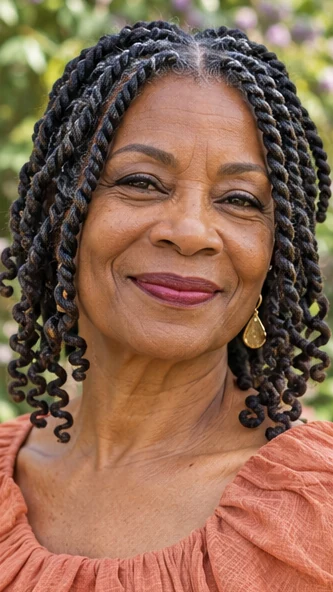
Let the shortest twists fall where you can see their ends. A small curl at the bottom can change where they sit beside your cheek. Use the longest face-framing twist to decide how far down the short pieces should sit.
A curl at its end can make it land higher after the style sets. Test the front with your reading glasses. If a curve ends against the lens, move the part a fraction or wear that twist near the ear.
9. Half-up twist bunch
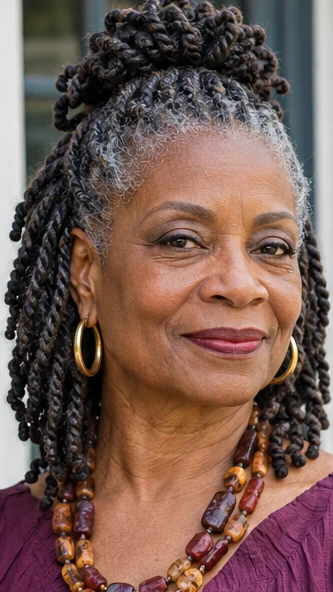
Pull back only the twists you want off your face. Keep the tie small enough not to pull on the shortest sections at the front. A half-up bunch leaves you with a view of the twists around the nape.
Choose which part of the top you want to see before you gather the hair. Let any short pieces near the forehead stay loose if they would need to be pulled. Check the fullness from the side before pushing the tie higher.
10. Short twists with a soft side part
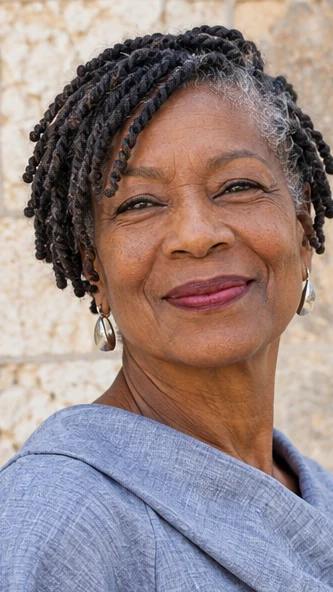
Instead of trying to cover the part, give one side a little more room to lie forward. The short twists can show where the face opens near the ear.
Adjust them after you’ve worn the style for a little while. If the other side falls naturally toward your cheek, leave that one loose.
Use a pin only if you need to hold the open side. Put the part where you usually divide the hair. Let one side fall forward instead of trying to make both sides look equally full.
11. Flat twist crown
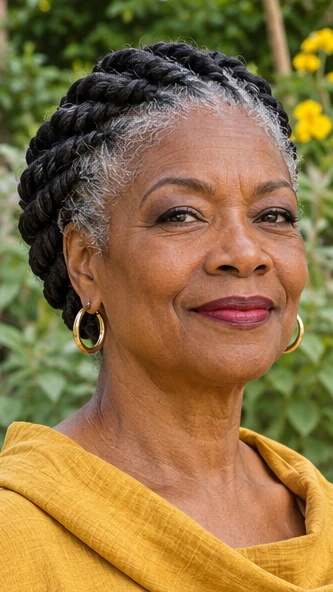
Guide the twists around the head and tuck the ends into a soft knot. Takedown note. Leave a little room around the ears for glasses and earrings. Follow the curve of the head and check where the crown braid meets the back.
If the twists are short, choose a smaller knot that can sit where they join. Tuck the ends under the twist closest to the nape. Leave enough space at the hairline to move your eyebrows without feeling any pull.
12. Twists with a low side part
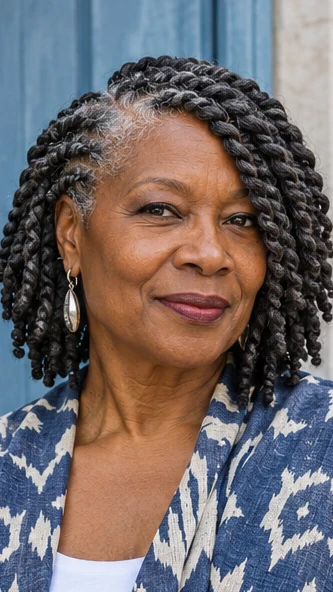
Choose a simple side part and let the twists drape across the fuller side. Move one twist back if it falls into your glasses. Look at which side you wear forward on ordinary days.
Let the low part leave that side with more of the length, then check the opposite side beside the ear. If a front twist keeps resting against your glasses, give it another place to sit before you use a clip to move the whole section.
13. Loose twist puff
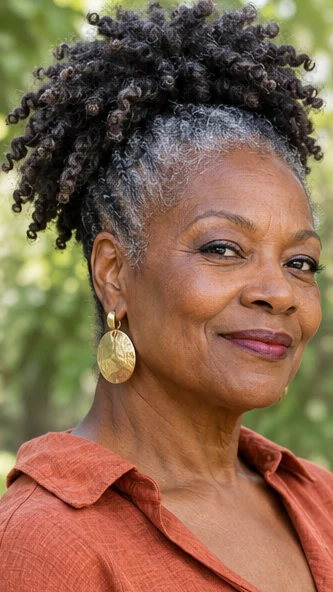
Gather the ends toward the crown while leaving the hairline relaxed. Use a band you can move without pulling against the roots. Put the band where the bulk of the twists will stay up on its own.
Keep it broad enough that the roots have room to move. Stand in profile to see the height before adding support. You can leave a few shorter ends loose beside your ear if they would need to stretch to reach the base.
14. Side twists with flat pins
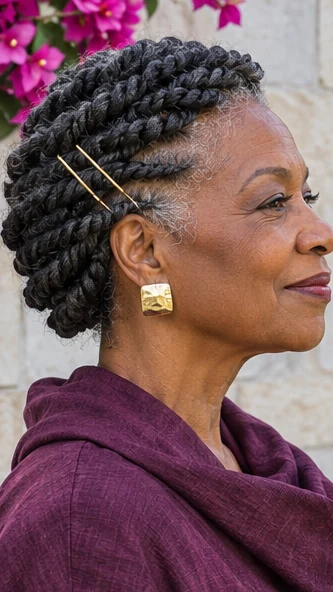
Look for the pin position near the fullest area of the twist. If you can see it in a straight-on photo, use a darker pin or slide it just beneath the surrounding section. Take the style down before sleeping if the pins press.
Leaving the twists loose can still keep the shape you like at the front. Keep the pins low and slide them under the twists. Test the side against your glasses before placing a second pin.
15. Scattered salt-and-pepper twists

Keep the silver strands where they grow through the twist, including at the temples. Take a daylight photo if you want to see how much of the gray reads from the front.
Choose where you want the whitest strands to show before you set the part. You may like seeing them along the front or mixed into the longer twists at the back.
Check the colors with the hair down. If the white disappears when you tuck a side, leave one bright twist loose near the ear.
16. Flat twists with ends left out
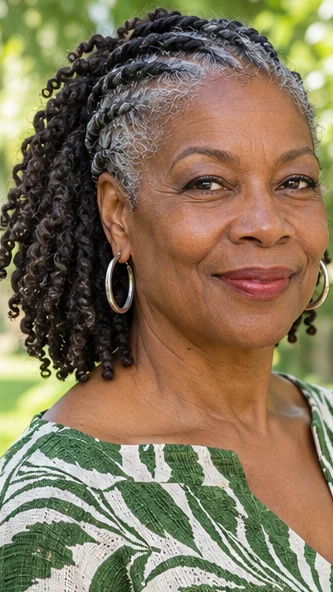
Twist only the sides and leave the ends loose at the back. This keeps some natural texture visible if you prefer a softer outline. Stop the twist where you want to see the natural ends.
That can leave a little width at the back. Try a rear photo with the hair down before pinning it into another shape. If most of the fullness falls in one place, move a few ends over with your fingers instead of tightening a tie.
17. Short chunky twists with a rounded shape
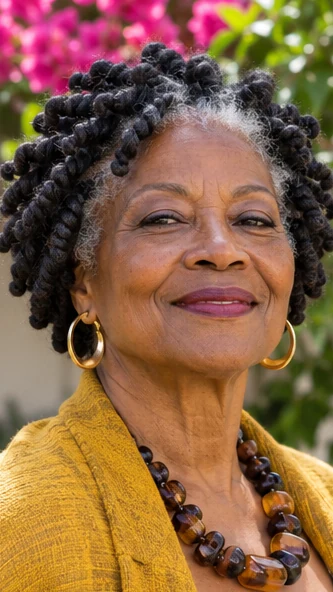
Let the back and sides sit close while the top keeps more length. Comfort check. Check the height after the twists settle. Use the outside shapes as your guide when the twists are finished.
The shortest ones beside the ear can still be round while the top keeps some height. Turn toward a mirror to see if the cut looks the same after you smooth the sides.
Leave a few ends loose if they soften the outline near the cheek. Check the front with your chin down so you can see which ends move.
18. Medium twists in a loop bun
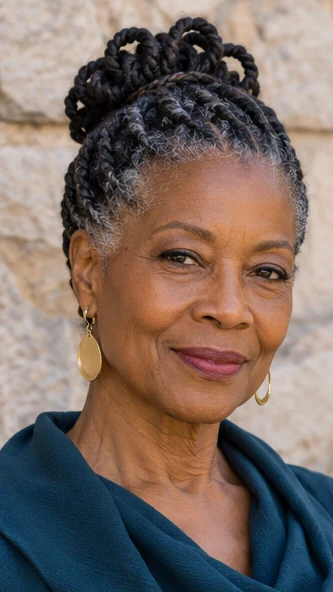
Fold only the part of the length that you need to bring up. You can let several ends sit at the base without making them all disappear.
Put on your collar and turn your head before you add another pin. If the fold presses, move it slightly rather than closing the tie tighter.
If the ends slide apart, use two flat pins underneath the loop. Fold the length into a loose loop at the nape. Tuck the ends with a pin instead of winding the tie tighter.
19. Low roll with mini twists
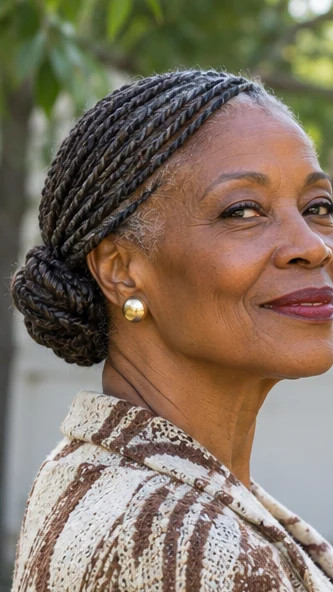
Roll the twists inward and pin below the edge. Leave enough give to turn your head without feeling the roll pull. Set the roll low enough to feel comfortable against the back of a chair.
Look from behind to see if the narrow twists show along the fold. A pin under the widest part may give it enough support. If the ends slip out, tuck them back in at the soft edge instead of folding them into a tight knot.
20. Pinned twist mohawk
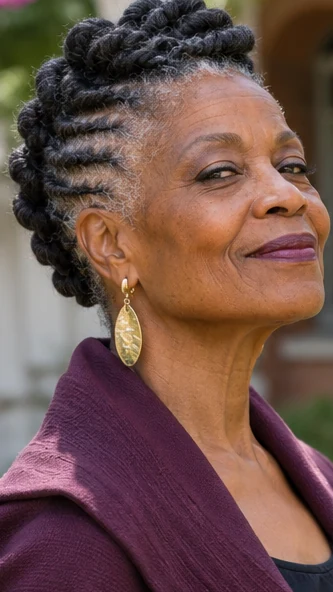
Pin a few twists up at the sides and leave the middle loose. Move the pins inward if you feel them pressing behind your ears.
Place the first pins where you want the shape to rise. Leave the ends of the twists free so they can still be seen across the top. Check one side against the arm of your glasses.
If the profile looks narrow enough, spare the twists near the temple and pin only those farther back. Leave enough space for a finger at the short side of the sweep.
21. Twists with a small side comb
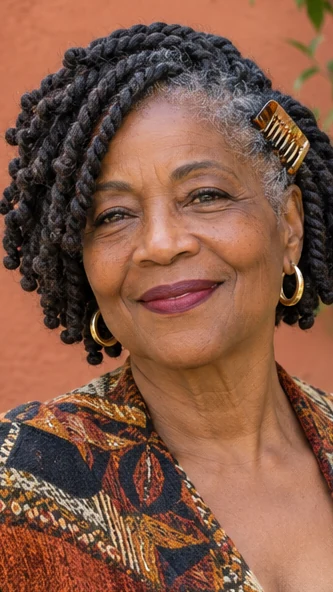
Place a comb against a section with enough grip to hold it and support it with a flat pin if needed. Remove it if it catches the roots when you turn.
Pick the comb after you’ve set the part. A narrow one can hold a short section without drawing all the twists to one side.
Put it where the teeth will grip without pulling as you turn. If you like the longer part loose, place the comb farther back so you still see that curve from the front.
For more ideas, see the guide to short haircuts for fine hair.
Further reading. American Academy of Dermatology guidance on tension and hairstyles.
The portraits are AI-generated illustrations of the featured looks.