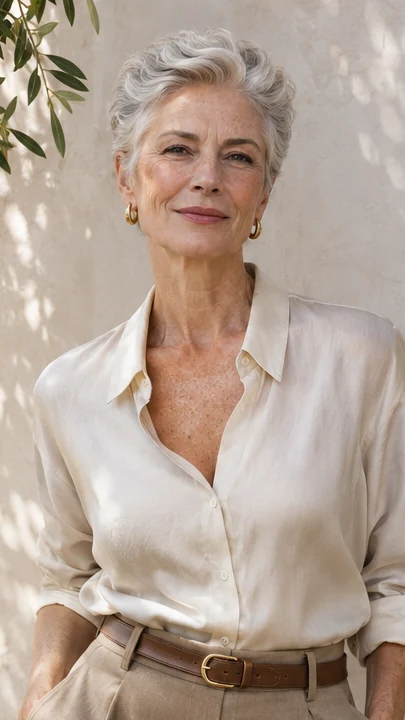
23 Wedding Guest Hairstyles for Women Over 60
Book the hair around the outfit. A high collar leaves less room for a low knot, and long earrings need room to hang without meeting a strand on the way down.
These wedding guest hairstyles include cuts you can style at home and updos you can show a stylist. Try the comb or clip while you still have time to switch it.
1. Low braided chignon
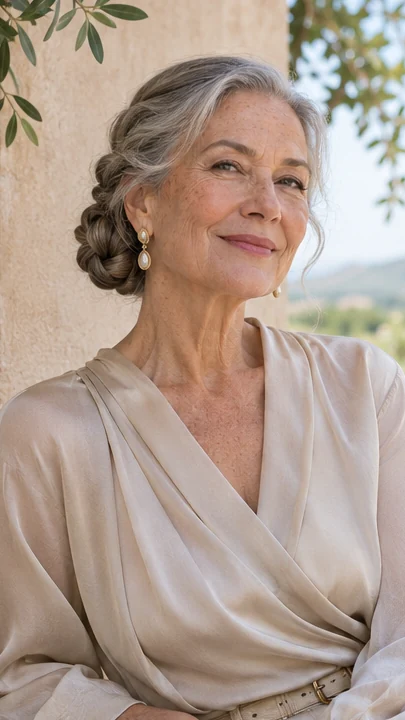
Pin a loose braid into a low knot and leave the sides soft. Test the pins with your collar and check that your earrings clear the knot. The braid should turn around the nape without sticking out behind the neckline.
Let a few details at the temple sit loose for the front view. Before you go, put on your wrap and slide it off again. Move any pin that catches so you can take the wrap off at the venue without disturbing the knot.
2. Half-up with a pearl barrette
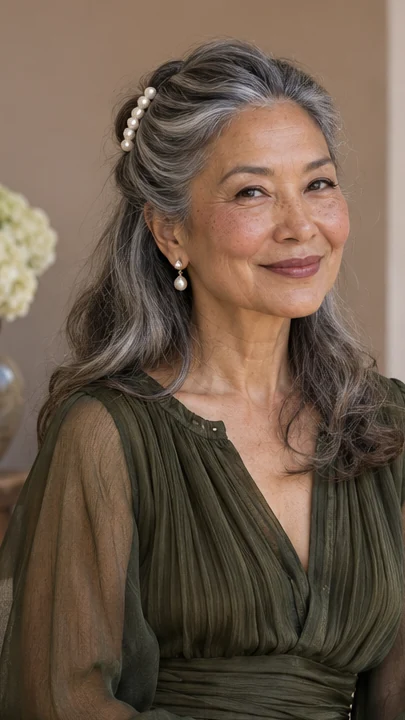
The pearl gives the back of your head a small point of light. Set it above the part of the hair that tends to slip, with enough length under the clasp to fill it. Check it after you lean back in a chair.
Add one hidden pin where the side moves if the barrette can’t hold that side by itself. Take just enough hair above the ears to put the barrette where it can grip. Leave a little space at the crown so the top can move.
3. Silver French twist
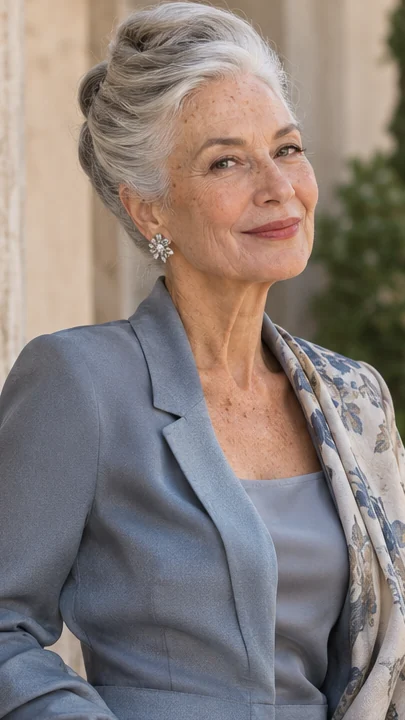
Fold the length at the back and add pins where the seam feels loose. Let the ends tuck in if the dress has a detailed neckline. Look at the fold from either side, especially if your dress has an open back.
The silver sections can show along the seam once you turn. Anchor the middle before pinning the top. Keep the end slightly loose if you prefer a less formal profile, and move one pin if it presses when you lift your chin.
Pack for touch-ups.
- One flat pin in a shade close to your hair.
- A covered tie if you plan to dance with your hair down.
4. Airy short finger waves
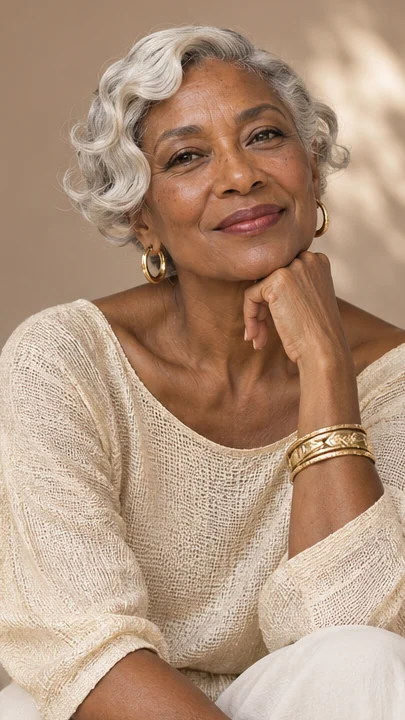
Set a gentle curve above the temple and keep the rest of the crop light. Let it dry before touching the bends, then check it with your earrings. Start with the wave closest to the brow, where you can see the shape from the front.
A soft curve can read as a detail without turning the whole crop into a set. Check the front after you slip on your glasses or jewelry. Move the end closest to the ear if the frame covers it.
5. Loose side chignon
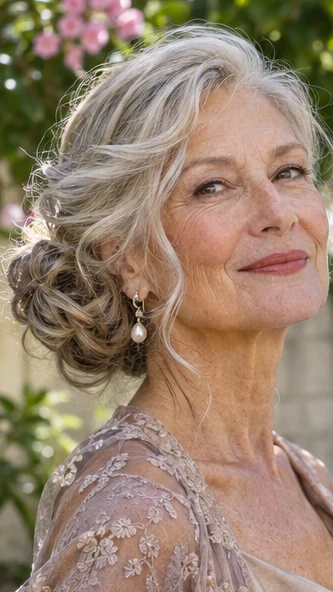
Position the knot below the ear so it shows from the front. Turn your head before you leave to see if it brushes the shoulder of your dress. The knot can sit on the side you expect to show most in photographs.
Leave room between it and the earring if both are visible next to your jaw. If the knot pulls forward under its weight, use two flat pins at its base. Let the loose section rest where it falls when you look down.
6. Short bob with a side comb
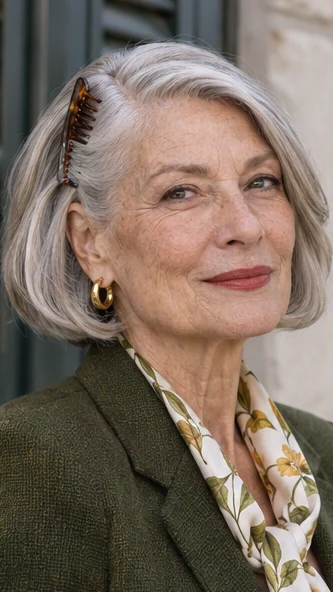
Choose a comb that follows the curve of the side. Tuck it into the hair once you’ve seen the front with both sides down.
A small section above the ear is enough to show the accessory. Put on any hat or head covering you’ll wear in transit and see if it slides across that spot.
Let the comb hold one side back and hide the pins under the hair. Pin test. Try it on with your glasses so the comb does not press against the hinge.
7. Collarbone waves with a tucked ear
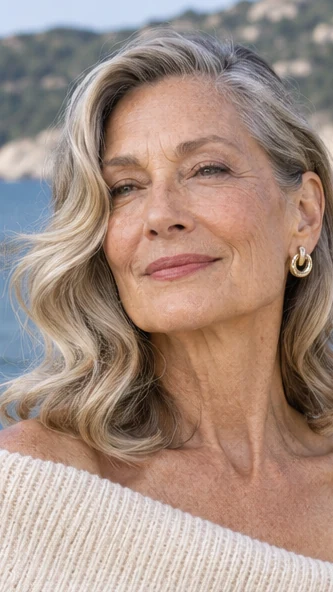
Let one side show the earring and keep the other wave loose. If wind is likely, add one flat pin behind the ear before you leave. Take stock of where the wave sits now before you brush the whole head.
A tuck on one side can clear the frame and put the fuller bend on display. Let it dry with the end loose. If the neckline sweeps across one shoulder, choose the opposite side for the front piece to fall against.
8. Low ponytail with a narrow ribbon
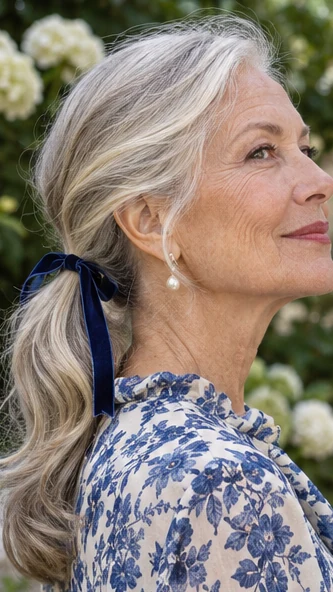
Tie a ribbon around the base and trim the ends where you want them to fall. Choose a narrow ribbon if the dress already has a bow. Let the fabric sit over a regular tie so the ribbon isn’t doing all the holding.
Choose a width that gives a little movement in profile without covering the nape. Check the tails before you cut them to size. Your hair can hang a little below the ribbon if you want the edge to show.
9. Pinned curls at the nape
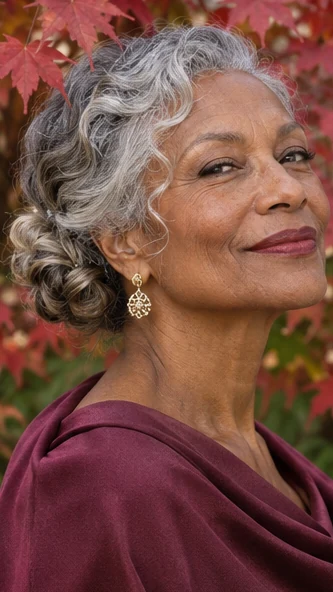
Gather curl groups one at a time and pin them underneath. Leave a little movement at the front if you want the shape to look like your own texture.
Choose a back view before you pin the curls so you can see how much of the neckline should stay clear.
Leave a few groups above the knot if they still have a shape you like. Keep the front soft around the ear. Turn your head slowly and remove any pin that catches a loose curl.
10. Short pixie with a jeweled pin
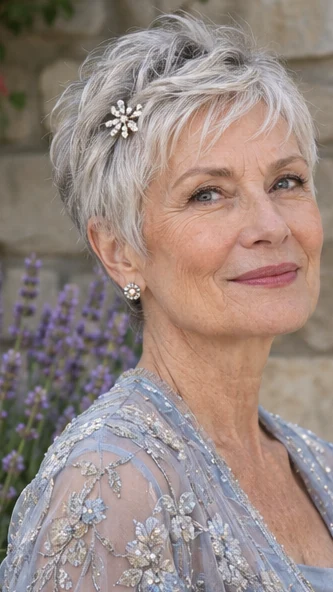
Put the pin where it shows while you face forward without losing the direction of the fringe. A little texture under it can help it grip. Test it after you’ve put on your other accessories.
Move it before adding more hold if it touches a glasses arm or catches on the back of an earring. Leave the short front free if it stays out of your eyes.
Place the pin above the ear on the longer side. Make sure the pin grips before you put on a coat or lift it off at the venue.
11. Swept-back coils with a small comb
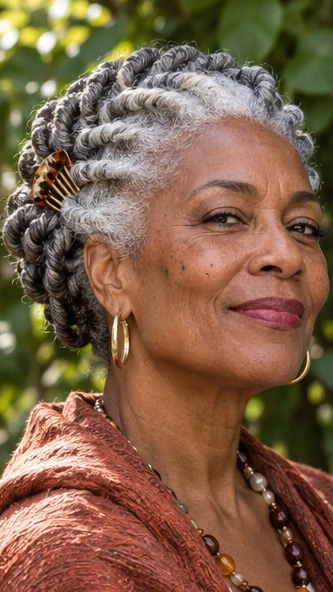
Use a comb to keep the hair away from one temple without pulling the roots tight. Accessory check. Check the grip after you turn your head. Choose a spot near the temple where the comb can sit with a little softness at the roots.
A slim comb leaves room for the coils to keep their outline on the other side. Check how it feels when you turn and look down. Move it into a fuller section if it keeps slipping out.
12. Half-up twist with soft sides
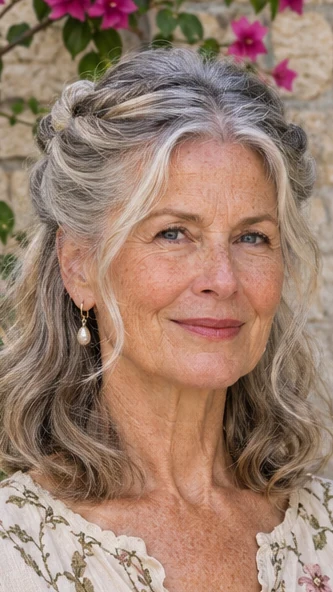
Twist a small section from each side and join them near the crown. The lower layers can stay loose if you want to keep some hair against your shoulders.
Bring the side sections back at the height where you want to see the twist from behind. Keep those sections loose enough that a bit of hair still falls beside the ear.
A flat pin at the join can help when the lengths are fine. Try it before you put on the wrap. Let the longer sides stay where they already move on their own.
13. Side-parted bob with a velvet clip
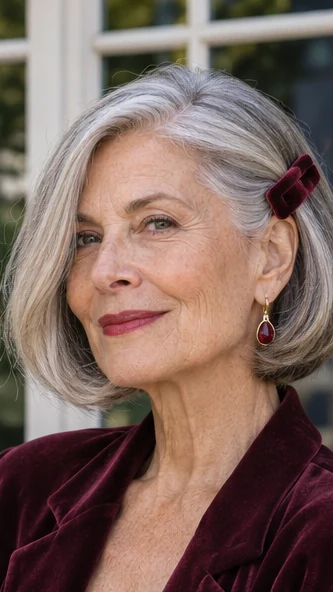
Choose a slim velvet clip to hold one side back. Place it above the frame arm rather than behind it if you’ll keep your glasses on. Let the smaller clip sit where it can catch light when you turn toward someone.
The velvet looks soft against a smooth edge, so leave the opposite side out. Look in a mirror with your head tilted down and make sure the clipped side still clears your glasses. A small shift is enough.
14. Low bun with loose front pieces
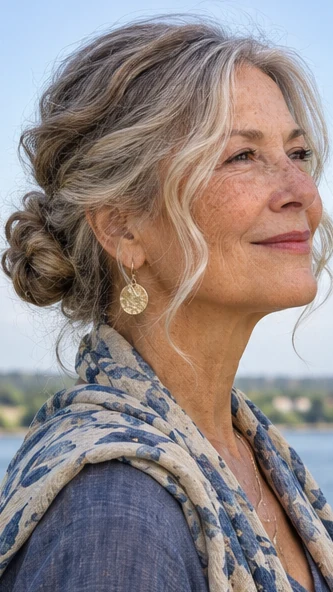
Put the bun low enough that the neckline is still easy to see. Let the front pieces dry into their own bend before you make the knot.
If a strand catches on a necklace when you turn, lengthen the tuck with a pin or give that side a deeper part so the piece falls away.
Test the piece after you’ve put your earrings in. Leave only the pieces you want near your face in the photographs. Check them when you lean forward and during a practice turn in the mirror.
15. Low roll with a hidden comb
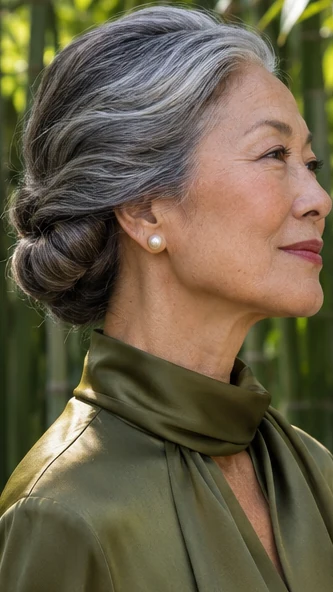
Roll the ends inward and tuck the comb into the base. Check the hold with a few turns of your head, then add pins where the roll moves. Choose a back view where you can see the fold against the dress.
The comb can sit at the strongest part of the roll, with a pin below if the end shifts. Let the rest of the hair sit where you like it near your ear. Check the shape against a headrest before you leave.
16. Short shag with one side swept

Hold the roots on the swept side with a clip until they dry. Keep the other side loose if you want the ends to move when you dance.
A slight change of part can let one side show the cut while the other keeps the waves loose. Smooth the side with the clip while it is damp and let the front cool.
Put the clip where you can see it from the side. If it drops, use a smaller section with more grip. Look at the crown once more after the sides have cooled.
17. Medium waves with a small brooch clip
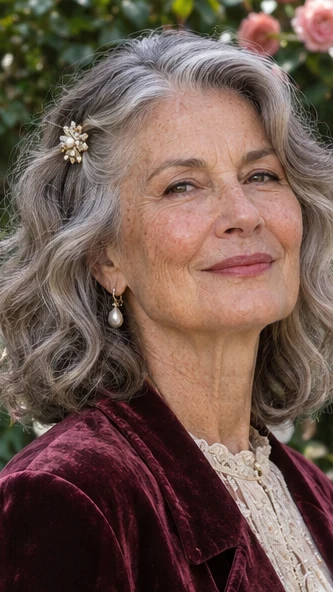
Choose one place for the clip to catch the light. Reception reset. A small piece near the temple works with many necklines without pressing on your frames. Put the clip somewhere you can point out in a front photo.
A wave over its edge can soften the outline while still leaving the piece visible. If the clip feels larger than your earrings, try wearing it farther back. Check the hinge area while you put on the frames you plan to wear.
18. Coily puff with a soft band
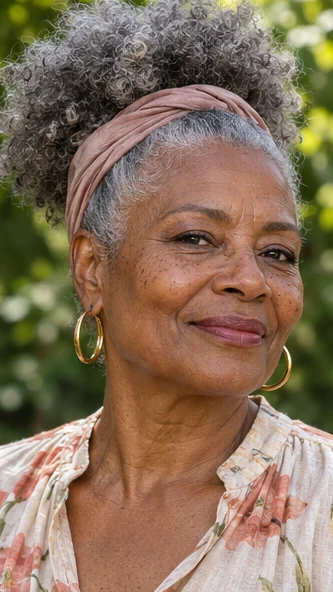
Give the puff room to rise without pulling the short strands along the forehead. Put the band in place and sit back for a minute to see how it feels. If you want more height, move the position instead of tightening it.
Leave the outer coils a little loose around the temple. Use a covered band with little pressure at the hairline. Check your profile with the band in place before you add a pin or move the puff higher.
19. Braided crown with a low knot
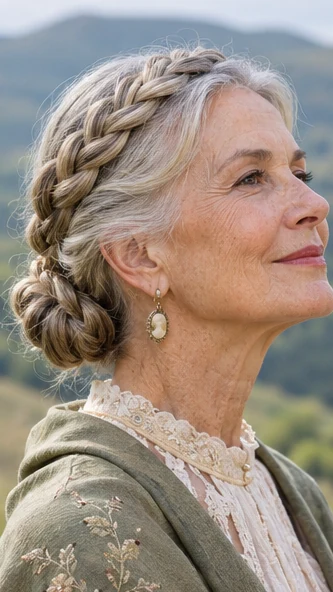
Lay a soft braid along the back and join it to a small knot. Avoid pinning it so tightly that the roots pull when you turn. Start the crown braid where it will leave the front of the head soft.
Look for a side view that shows the join near the knot. If the braid sits higher than you wanted, move it before pinning the remainder. Leave enough space around the ear if you plan to wear a small hoop.
20. Half-up bow with a side part
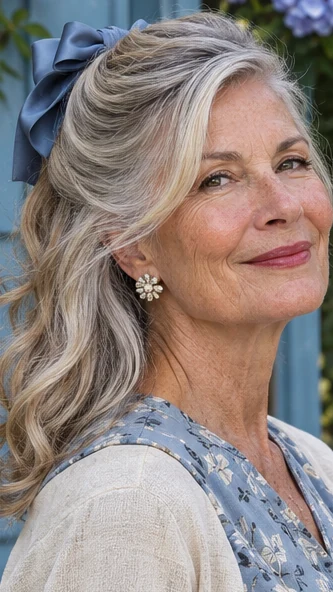
Part the hair where it falls before gathering it. A small bow keeps the pattern of a printed dress in view.
A side part can let a small bow show when you turn without taking over the back. Keep the sides loose near the ear and bring just the top half of the hair to the tie.
Test if it stays put when you take off your wrap. Make one small adjustment at the base if needed. Leave one narrow section loose if the bow pulls above the ear.
21. Brushed-back pixie with polished sides
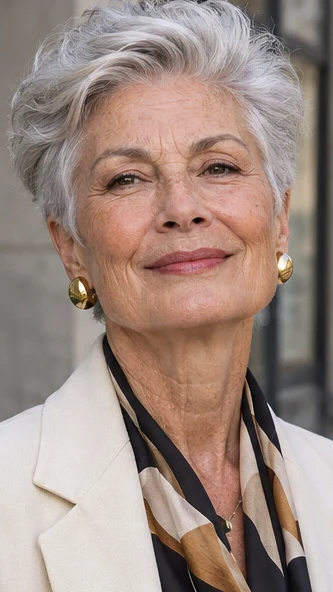
Dry the front away from the brow and let it cool before finishing. Use fingers around the back so the crown keeps some natural movement. Let the roots cool in the direction you want the front to go.
The shorter pieces along the sides can lie close while the top keeps some height. Choose the finish after you’ve seen what the cut does on its own. A trace of product can hold one area without coating the whole crop.
22. Side-swept curls under a broad clip
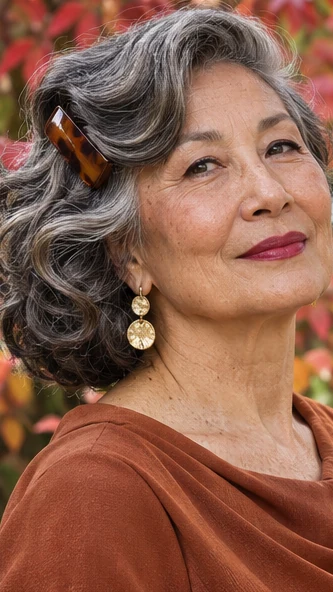
Try the broad clip where it can grip a small group without flattening the curls nearest the face. Let the rest sit against a shoulder or tuck it back if you want the neckline open.
Move one coil out from the edge if it falls across your glasses when you look down. Sweep the curls to one side and anchor the hair near the nape. Let a few groups fall loose beside the cheek for the front view.
23. Twisted ponytail at the nape
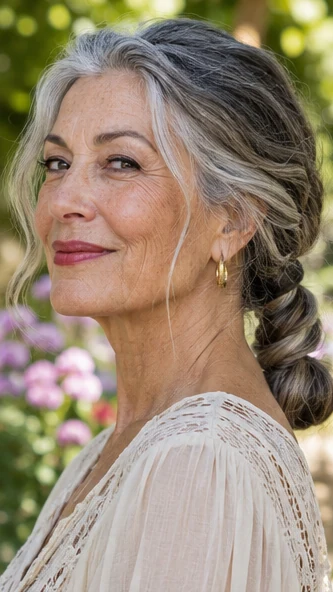
Wrap a small piece around the tie and pin it into the base. Keep the ponytail low enough to sit against your neck while you put on a wrap. Gather the ponytail low and leave the front soft beside the ear.
The wrapped piece can make the tie disappear without needing to make it any tighter. Before you pin the last end, lift your shoulders as you would when you put on a coat. Move the base down if it catches on the collar.
For more ideas, see the guide to short haircuts for fine hair.
The portraits are AI-generated illustrations of the featured looks.